Preparing a workspace and
making
cutouts in Windows Paint
Windows 7 users
The general instructions—formats for saving, how to make cutouts etc—are different in Windows 7, and several useful shapes are available ready-to-use from the Shapes tool.
Please read through the Paint for Windows 7 tutorial before considering these exercises.
This page is the key to everything in this section.
It's the "Getting Started" directions for the examples illustrated.
Please read over this page and set up the suggested workspace before beginning one of the sample projects linked from here.
Each example needs to be made in the file you've saved as workspace (bmp or gif depending on your operating system) then cut out, copied and saved as a separate file. The how and the why are explained on this page.
Shapes you can make in Paint
Plus a couple of questions answered
Each of these pictures links to a page demonstrating how to make that particular shape, or how to deal with a certain problem.
A brief explanation of each example is included in the Text Links below.
Jump over the picture links and go to Setting up your work space.
Shapes you can make
Questions and explanations
Please read these notes before starting one of the projects above and do be aware that what I have to say here would not work with photos—in fact, it would ruin them!
You can always paste a completed gif into a jpg—into a photo. That's a good way to add crisp text, a speech balloon or an arrow to a photo. Just remember to always save the photo as a jpg.
If you would like to work in Paint while you follow this page, do remember that you can resize your browserA Browser is the program you use to visit sites on the Internet. Internet Explorer (IE) may be the browser that you use, but there are many others, such as Firefox, Opera, Google Chrome, K-Meleon and Blackbird.
You can have as many browsers as you like, and run more than one at the same time. window. If the window is maximised—taking up the whole screen—you'll first need to click the restore button (the middle one of these) ![]() , then just hover your cursor over a side edge of the browser window until a double-headed arrow appears, press your left mouse button and drag left or right until the window is a suitable size.
, then just hover your cursor over a side edge of the browser window until a double-headed arrow appears, press your left mouse button and drag left or right until the window is a suitable size.
You can then grab the browser window by the title bar and drag it to the position that you want it in. You can do this with almost any window on your computer.
Your workspace file
These notes may be all you want, but if you'd like more information about one point or another you'll notice links to fuller explanations, usually with accompanying pictures.
If you do several exercises from this section, you will see the same information repeated again and again. If each page is to stand alone, I'm afraid that that's unavoidable.
Vista users
Some instructions will seem unnecessary; for instance, clicking on the Line tool to set a line width before clicking the Ellipse tool, the Rectangle tool or the Polygon tool. In Vista the thickness option is available with those tools. Previous to Vista, it was necessary to click on the Line tool and choose a thickness before clicking on Ellipse, Rectangle or Polygon.
On the other hand, zooming in, unless you use the View menu, can feel like guesswork, so take "2x" to mean "a little" and "8x" to mean "as far as possible".
Setting up
Open Paint, go to the File menu and click on Save.
Type workspace as the name for the file.
Click the drop-down at the end of Save as type.
Choose 256 color bmp if you're working in 98 or XP.
Choose gif if you're working in Vista. See Formats for your work space
Click the Save button.
Back in Paint, go to the Image menu and click Attributes.
Type 500 (or a greater number) into both width and height places.
Check that Units is set on Pixels and that Colors is set on Colors.
Click OK. See Have a big workspace and Changing width and height of your workspace
Go to the File menu and click Save. top
Why not just go File > New each time?
Transparency
Unless it says othewise, always have white as your background color—the color on the right button—and always have the transparency option for copy/move/paste.
Reopening and using
Each time you open Paint to do one of these exercises, go to the File menu and click workspace (bmp or gif) on the list at the bottom.
If workspace is not on the list, click Open and navigate to workspace.
Click its name and click Open. See Opening a file you used recently
Saving your work
While you are working on one of the examples, save every few minutes, just as you normally would, either by going to the File menu and clicking Save, or by pressing the Ctrl key and tapping s.
When you finish an example, or when you get to a stage where your work ought to be saved for later use, click the Rectangular Selection tool and draw a marquee around what you want to save.
Go to the Edit menu and click on Copy To. See Saving pictures from your workspace
Type a name into the dialogue box, check that the Save as type says 256 color bmp if you're working in 98 or XP or gif if you're working in Vista.
Click the Save button.
Later on, you may like to Resave bmp files as gif. top
Using a saved cutout
Many of the examples recommend your saving a grid or a template for use when making other pictures. Here's how you use a saved cut-out.
You'll be most comfortable if the top left-hand corner of your window is empty.
(That doesn't necessarily mean the whole work space—just the part you can see.)
Go to the Edit menu and click Paste From.
Navigate to the wanted picture.
Click its name or its thumbnail picture and click Open.
The picture will usually appear in the top left corner of your window.
Click the Transparency option.
Put your cursor anywhere inside the cutout.
Drag the cutout a little bit down and to the right so that it'll be easier to get at. See Pasting saved files into your workspace.
You can use this method to get the original XP color sampler shown below.
When you finish something
When you've completed an exercise and have saved everything you want to keep through the Copy To procedure, clear your work space.
Make sure that your background color is set to white.
Go to the Edit menu and click Select All.
Press your Delete key.
Go to the File menu and click Save.
The Hows, Whys and Wherefores are explained below. top
Formats for your work space
Not jpg, not 24 bit, only 256 color bmp or gif
To do the exercises in this section, you will need to work on a file that's been saved as a 256 color bmp in 98 or XP, or as a gif in Vista. You will use this file over and over again, clearing it after saving finished work as a cutout. Just be sure to steer clear of 24 bit, which doesn't convert nicely into gif and with which some operations may not work.

 For your first save, Paint may suggest jpg. Use the dropdown beside Save as type and choose the correct format. These two snips show why that's important—jpg blurs lines, and you need clean, clear lines for this work.
(Naturally, once any shape is finished and saved, you can paste it into a jpg or any other picture.)
As soon as you open Paint, before you make the first mark, click File, Save As.
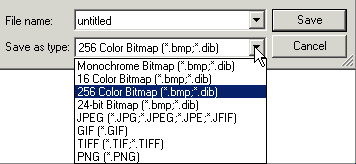 Then, if you are using Windows 98 or XP, in the dialogue box that appears, click the drop-down arrow at the end of the Save as type place.
Click the item "256 Color Bitmap".

Type a name for the file.
Click Save.
.
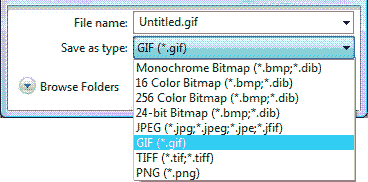 Or, if you are using Vista, in the Save dialogue, click the dropdown arrow beside Save as type and click on GIF (*.gif).
.
 Then type a name for the file and click the Save button.
.
No matter which operating sytem you are using, as you are being returned to the Paint window, you'll get this warning:
 "Saving into this format may cause some loss of color information.
Do you want to continue?"
Click Yes!
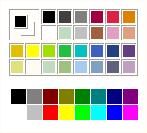
Original XP colors
![]()
![]() If you'd like to be able to use some of the original colors from older versions of Windows without editing colors, save this sampler.
If you'd like to be able to use some of the original colors from older versions of Windows without editing colors, save this sampler.
Right click, choose Save Picture As or Save Image As. Click Save in the dialogue box that appears.
To use the colors, when you have workspace.gif open, go to the Edit menu, choose Paste From and navigate to 16_color_sampler.gif. Click Open.
Drag the sampler out of your way and use the color picker to pick up any color you want to use.
You can, of course, edit the colors on the palette, but I find using a pasted block of colors quicker and easier. top
Have a big workspace
If your work area is very small, you may like to make it larger. It's much easier to work in a reasonably sized area. Also, there should be room for the safe copies you'll be wise to make when starting to do anything tricky.
The only disadvantage of a large work area is that the zoom tool doesn't always put you in the right spot, but that can be overcome, largely by working in a small window.
(If it puzzles you when I say "big workspace" but "small window", think of looking into a house through a small window in an outside wall. You can't see all of the room you're looking into.)
If the workspace file is a bmp, it will be big in byte size, but since you're going to use the same file over and over again, that's not a huge problem. top
Changing width and height of your workspace
The workspace file will need to be 500x500 pixels—or more—in size.
(You may find this size too big—or even too small. Start with this suggested size and decide once you've done a couple of examples.)
Your window needs to be around 500 pixels wide for you to make use of the Status Bar.
Image > Attributes
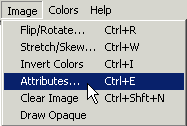
1. Click Image on the menu bar.
2. Click on Attributes in the Image menu.
.
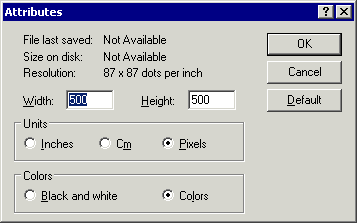 3. Type in a width and height that you feel would be useful.
4. Check that Units is set to Pixels.
5. Click OK.
This will be the size of your whole workspace; not of the window in which you're working. You can make your window any size you want, by dragging the sides and bottom.
A small window, with scroll bars at right and bottom, helps to focus the Zoom tool.
A big workspace gives you plenty of—well, workspace.
Setting Attributes is not a life-time decision. You can use the same method to make your workspace bigger or smaller at any time. Note, though, that if you make it smaller when you have work on the right or near the bottom, that work will be cut away and lost. It's better to change the size when the workspace is empty.Go back to Setting up top
Saving pictures from your workspace
Obviously you will save frequently while you are working, but when you have completed something, save it by means of a cut-out.
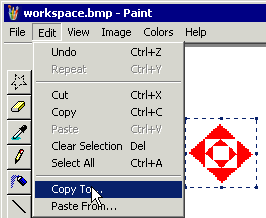 Copy To
 With the rectangular selection tool, draw a marquee around the picture that you want to save.
Click Edit on the menu bar.
On the Edit menu, click Copy To.
In the Save dialogue box, type a name for the cutout. The Save as type place should automatically read as the format of your workspace—256 color bmp in 98 and XP, gif in Vista. Just glance to make sure that is so before you click Save. Go back to Saving your work top
Pasting saved files into your workspace
For many of the shapes made in this section you will need to work over a grid. Sometimes the first stage of a picture produces a template which it's wise to save. Also, you may want to save partly finished pictures to work on later.
Once you've made the grid or other picture and saved it by the Copy To procedure described above, you can retrieve it for use whenever you need to.
Paste From
With workspace open in Paint, go to the Edit menu and choose Paste From.
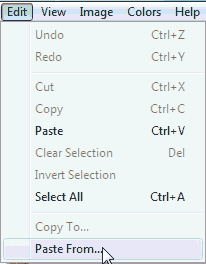
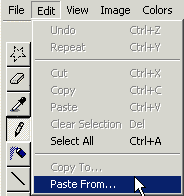
Navigate to the wanted file and click on it so that it becomes highlighted.

Click Open.
The selected picture will appear in the top left corner of your workspace.
 Click the Transparency option.
While the picture is still selected, drag it to wherever you want it.
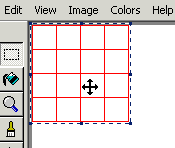 If you're happy with its being at top left, still drag it just a little down and to the right, so that you can more easily select it later on.
What you now have in your workspace is just a copy of the picture. The picture itself is still where you last saved it and it won't be affected by anything you do to this copy. Go back to Using a saved cutout. top
Resaving bmp files as gif
This doesn't concern users of Vista. Your cutouts are already saved as gifs! You might like to jump down to Opening a file you used recently.
Your pictures will need to be in gif format if you're going to use them as decorations in email stationery. If you intend them strictly for use in printed documents, bmp is fine. (But embedding a big bmp file in a Word document and attaching that to an email is not the way to win friends.)
File > Open, File > Save As
To re-save a cutout, open it in Paint, click the File menu and click Save As.
In the Save box, click the drop-down arrow at the end of the Save as type: place and choose GIF (*.gif).
The file name will already be suggested, so click the Save button.
You'll now have two copies of the same picture, one a bmp and one a gif.
When you've accumulated a few such pairs, you may wish to delete the bmps. top
Compare the file sizes of bmp and gif
Here's your opportunity to see why gif is one of the formats considered best for use on web pages and in stationery.
Open the folder where your recently resaved pictures are stored.
Make a note of the View you're currently using—thumbnails, icons, list or whatever—so that you can restore this view after you've inspected file sizes.
On the View menu, choose Details.
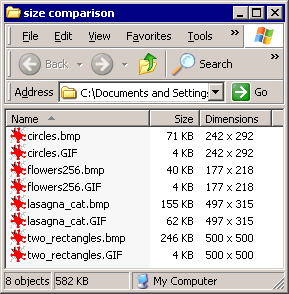 Click at the top of the Name column to arrange the pictures by name. Now your pictures will be in pairs—flower01.bmp, flower01.gif, flower02.bmp, flower02.gif and so on.
Now look at the Size column. Even with quite small files, you'll see a noticeable difference in size between the two formats.
Here is a folder containing two copies each of four pictures. You can quickly see that bmp files are bigger than their gif copies.
To restore the folder to the way you like it, go back to the View menu and choose the view you had before: List, Icons or whatever.
Delete the bmp files if you wish
You may have lots of space and prefer to keep the original bmp files. That's entirely up to you.
If you would rather discard them, just hold the Ctrl key and click each bmp—but not workspace.bmp.
Release the Ctrl key.
With your pointer on one of the highlighted files, right click and choose Delete.
Click Yes in the confirmation box.
Go back to Saving your work. top
 Opening a file you used recently
File menu > Recent files
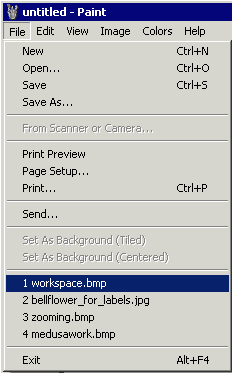
To open a file that you've used and saved recently, open Paint and click on File in the menu bar. Right at the bottom of the File menu you'll see a list of the last four files. Click on the name of the one you want to open.
Usually, files saved through Copy To aren't included unless they've been opened and resaved. To get a saved cut-out, use Paste From.
Annoyingly, sometimes the name of a file that you've deleted will be listed at the bottom of the File menu. This is common to programs throughout Windows. It's quite reasonable when you think about it.
(Imagine a person asking the postman, "Think of the last four houses to which you delivered letters? Where are those letters now?" It isn't the postman's job to know whether the mail was kept or thrown away. He only knows where he made deliveries.) Go back to Reopening and using
Why not just go File > New each time?
Well, you could, but then you'd have to go through the Save As > 256 bmp (or Save As > gif) routine each time and click OK in the "Loss of Color Information" box. At the end of each exercise, you'd still need to select the finished picture and do a Copy To, unless you wanted to keep all your bits and scribbles along with it. Finally, you'd accumulate a heap of working files cluttering up your picture folder and making wanted files just that little bit harder to find.
OK. Truth will out; I've had lots of left-over working files. After a few weeks, I'd forgotten what they were all about, or I'd bundled a couple of dozen into a folder by themselves and forgotten the name of the folder. Every now and then I had to go through them one-by-one, decide whether they were of any use—usually they weren't—and delete the unwanted ones one at a time. Of late I've mended my ways and things are much easier to find.
Go back to Setting up your work space.
.
Text links to examples
Picture Links are at the top of this page
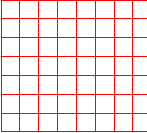
![]() Grids Using Paint's excellent copy/paste, make a couple of grids which you can use over and over again when making different shapes. Very easy.
Grids Using Paint's excellent copy/paste, make a couple of grids which you can use over and over again when making different shapes. Very easy.
.
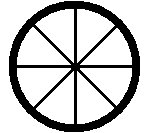
![]() Wheels This method will make any sort of wheel or disc. No grid needed. Easy. Starts by showing how to make concentric circles.
Wheels This method will make any sort of wheel or disc. No grid needed. Easy. Starts by showing how to make concentric circles.
.
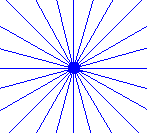
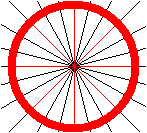
![]() Twenty-four Spokes To make a bicycle wheel look more realistic. Needs the 8 by 8 grid. Shows how to use Flip/Rotate to get a picture the same on all four sides. Some care and patience needed.
Twenty-four Spokes To make a bicycle wheel look more realistic. Needs the 8 by 8 grid. Shows how to use Flip/Rotate to get a picture the same on all four sides. Some care and patience needed.
.
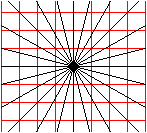
![]() Attach Spokes to Wheel Puts together Wheels and Twenty-four Spokes. Not hard. Use Color Eraser to make temporary color changes.
Attach Spokes to Wheel Puts together Wheels and Twenty-four Spokes. Not hard. Use Color Eraser to make temporary color changes.
.
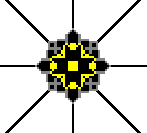
![]() Hub To cover the rather messy centre resulting from joining 24 spokes to a wheel. Done in close view, mostly using the Pencil tool. Flip/Rotate to get a picture the same on all four sides.
Hub To cover the rather messy centre resulting from joining 24 spokes to a wheel. Done in close view, mostly using the Pencil tool. Flip/Rotate to get a picture the same on all four sides.
.
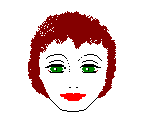
![]() Faces Draw a face using the same ideas as in "Symmetry". Includes a few suggestions for getting started with a face and for making changes.
Faces Draw a face using the same ideas as in "Symmetry". Includes a few suggestions for getting started with a face and for making changes.
.
![]() Hexagon How to draw a symmetrical hexagon, using a 4 by 4 grid and the Polygon tool. Easy.
Hexagon How to draw a symmetrical hexagon, using a 4 by 4 grid and the Polygon tool. Easy.
.
![]() Six Pointed Star How to draw a six pointed star, using a 4 by 4 grid, two equilateral triangles and the Polygon tool. Easy.
Six Pointed Star How to draw a six pointed star, using a 4 by 4 grid, two equilateral triangles and the Polygon tool. Easy.
.
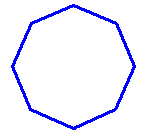
![]() Pointy Topped Octagon Very easy. Four small squares, diagonals and a circle. Finish with either the Line tool or the Polygon tool.
Pointy Topped Octagon Very easy. Four small squares, diagonals and a circle. Finish with either the Line tool or the Polygon tool.
.
![]() Flat Topped Octagon Fairly complicated, but it works. Finish with either the Line tool or the Polygon tool.
Flat Topped Octagon Fairly complicated, but it works. Finish with either the Line tool or the Polygon tool.
![]() Five Pointed Star How to draw a five pointed star, using an 8 by 8 grid and either the Line tool or the Polygon tool. Takes care and patience. Includes a note on what to do if a color can't be removed by flooding.
Five Pointed Star How to draw a five pointed star, using an 8 by 8 grid and either the Line tool or the Polygon tool. Takes care and patience. Includes a note on what to do if a color can't be removed by flooding.
.
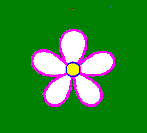
![]() Five Petalled Flower Adapt the template that you made for the five pointed star and draw this flower with the Curve tool. Make differently colored flowers and assemble them into a posy. Best done using 256 colors.
Five Petalled Flower Adapt the template that you made for the five pointed star and draw this flower with the Curve tool. Make differently colored flowers and assemble them into a posy. Best done using 256 colors.
.
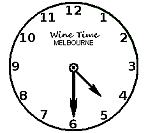
![]() Clockface Using a 4 by 4 grid, position numbers evenly on a clockface. Then add hands, a decorative centre and some text.
Clockface Using a 4 by 4 grid, position numbers evenly on a clockface. Then add hands, a decorative centre and some text.
.
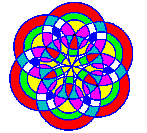
![]() Compass Rose Try the simpler example first, to get the idea, then go on to the more complex and rather pretty second and third examples. No grid, just circles for the simpler one and concentric circles for the other two. Demonstrates clearing colors with repeated left-right clicking with Flood Fill tool.
Compass Rose Try the simpler example first, to get the idea, then go on to the more complex and rather pretty second and third examples. No grid, just circles for the simpler one and concentric circles for the other two. Demonstrates clearing colors with repeated left-right clicking with Flood Fill tool.
.
![]() Symmetry Easy way to make a shape the same on both sides using Image > Flip. No actual object to draw; just a process you can apply wherever needed. No grid.
Symmetry Easy way to make a shape the same on both sides using Image > Flip. No actual object to draw; just a process you can apply wherever needed. No grid.
.
![]() Zoom tool If you get lost when you zoom in to a close view, here are a few suggestions that may help you. Explains difference between "workspace" and "window".
Zoom tool If you get lost when you zoom in to a close view, here are a few suggestions that may help you. Explains difference between "workspace" and "window".
.
![]() Use XP colors in Vista Of course you can edit colors, and that's touched on, but a simpler way is to copy and paste the basic sampler, or to make a similar sampler of colors you've edited and would like to save for later use.
Use XP colors in Vista Of course you can edit colors, and that's touched on, but a simpler way is to copy and paste the basic sampler, or to make a similar sampler of colors you've edited and would like to save for later use.
![]() Explanation of dithering Dithering happens when pictures with millions of colors are saved into a format with fewer colors. It makes some processes difficult in Paint.
Explanation of dithering Dithering happens when pictures with millions of colors are saved into a format with fewer colors. It makes some processes difficult in Paint.
Questions or comments? I'd love to hear from you, especially if you have helpful suggestions regarding any one of this set of pages. They were begun in response to some reader questions and I've arrived at solutions through trial and error. As I went over the exercises and tried to follow my own instructions, I several times saw a quicker or easier way to do something and it's likely that readers may still see some better solutions.
My email address is here.
Return to top
Drop-Down Menu from Brothercake
Everything below this is a javascript menu. If you are using a reader,
please use the links here.
