Draw hexagons in MSPaint
 Other Pictures, Problems and Procedures
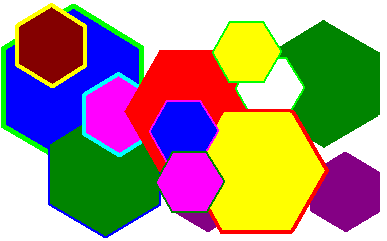
Wingdings2 characters Alt+0194 and Alt+0195 are hexagons.
In Paint for Windows 7, there's a hexagon in the Shapes gallery.
If you would like to work in Paint while you follow these directions, do remember that you can resize your browserA Browser is the program you use to visit sites on the Internet. Internet Explorer (IE) may be the browser that you use, but there are many others, such as Firefox, Opera, Google Chrome, K-Meleon and Blackbird.
You can have as many browsers as you like, and run more than one at the same time. window. If the window is maximised—taking up the whole screen—you'll first need to click the restore button (the middle one of these) ![]() , then just hover your cursor over a side edge of the browser window until a double-headed arrow appears, press your left mouse button and drag left or right until the window is a suitable size.
, then just hover your cursor over a side edge of the browser window until a double-headed arrow appears, press your left mouse button and drag left or right until the window is a suitable size.
You can then grab the browser window by the title bar and drag it to the position that you want it in. You can do this with almost any window on your computer.
Open workspace.bmp or workspace.gif. If you haven't made that yet, please read Your workspace file. The infomation there is important, and will make all the difference to easy working. You only need to set up the workspace once and you're all set for any picture in this set of examples.
Start with a grid
Go to the Edit menu and click Paste From.
Navigate to grid16, which you saved earlier. Double click its name and click Open.
If you have not yet made it, the easy directions for grid16 are here.
The grid will appear in the top left corner of the Paint window. Drag it a bit down and away from the edge of the window.
From the color palette, choose a dark green.
Zoom in to 2x view—or closer if you prefer, but you do need to be able to see all of the grid in your window. top
Draw a circle
Click the Line tool.
 Set your line thickness to the top option, a one pixel line.
Click the Ellipse tool.
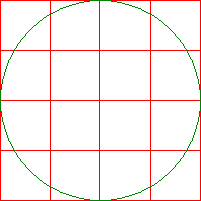 Choose the top option, Outline with no Fill.
Position your cursor exactly over the the top left corner of the grid and drag to the bottom right corner, making a circle to exactly fill the grid. Don't bother with the Shift key; just aim for the bottom right corner and then go one pixel to the right and one pixel down, making all sides touch in the same way. top
top
.
Draw "spokes"
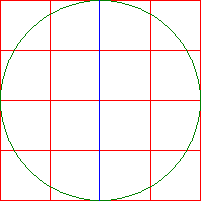 You are still zoomed in.
![]()
Click the Line tool.
Click on strong blue in the color palette.
Now draw a line from top to bottom. You can hold the Shift key to help you make it straight.
For the two subsequent lines, the Shift key won't help. However, you'll find that your lines will be straight and will pass through the centre. Each one starts and ends where the circle intersects with a red line.
.
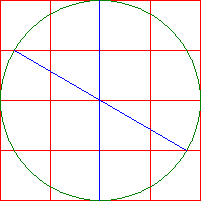 For the first sloping line, put your cursor on the edge of the circle exactly where it intersects with the red line above the middle on the left. Get the horizontal arms of the cursor right on the red line.
Draw a slanting line down to the point where the lower part of the circle meets the red line below the middle on the right.
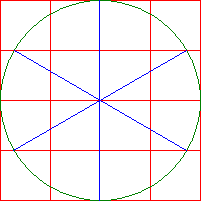 Start another blue line on the left where the circle meets the red line below the middle. Draw a slanting line up and to the right until it meets the intersection of the red line above the middle with the green circle. top
Make a copy and save it separately
At this point, it's a good idea to save a copy for later use. Draw a rectangular selection around the outside of the red square, click Edit on the menu bar and choose Copy To. Type a name in the dialogue box that appears. Make sure that you're saving as either bmp or gif and click Save.
Having done that, and while the selection is still active—you can see a dashed line around it—press the Ctrl key and drag a copy off to the side somewhere. This will be your safe copy in case something goes wrong.
Draw the sides of the hexagon
You may feel that this step is not necessary, but whenever I tried to draw the hexagon without these guidelines I got one or other of the straight sides crooked.
You are still zoomed in.
Click on the Line tool.
Choose black from the palette.
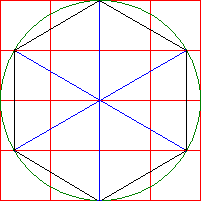
Position your cursor over the top of the vertical blue line where it meets the circle.
Draw a line from there to the end of the next blue line.
From that point to the next the line will be vertical, so hold your shift key to get it straight.
The next line is a sloping one, so don't hold the shift key. Just draw from where you are to the next place where a blue line meets the circle.
Continue drawing lines in this way until you get back to your starting point.
You can now see the shape of a regular (well, pretty regular) hexagon outlined in black.
Save?
You may wish to save a permanent copy of this outline as well. If so, use the Copy To procedure again, giving the outline the name hexagon_template. top
Draw the hexagon
From this point, there are two ways that you can go.
You can use the Polygon tool, which gives you neat corners even when you use a thick line.
OR
You can use the shape you have outlined already. If you want either a solid color with no outline or an hexagon with a thin outline, go for this option. It's quicker and straightforward.
Here's what you do.
Draw the hexagon using the Flood Fill tool
![]() Click on the Flood Fill tool.
Click on the Flood Fill tool.

![]() Have red as your foreground color and white as background.
Have red as your foreground color and white as background.
 In each segment of the hexagon, click with your left button, then with your right, until your picture looks like this.
Change your foreground color to blue.
 In any segment of the hexagon, click with your left button and then with your right. Then click once more with your left button and you have a complete blue hexagon with a fine black edge. top
Clear away construction lines
 Click on the Rectangle tool and choose the top option, which means outlined rectangle with no fill.
Change your foreground color to brown.
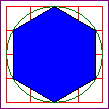 Draw a border around the whole picture. It doesn't have to be neat. It's just to stop flooded colors going all over the page.
Change your foreground color to red. You should still have white as the background color.
![]() Click on the Flood Fill tool.
Click on the Flood Fill tool.
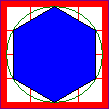 Put the flood fill cursor between the protective border and the red square and click with your left button and then with your right.
The white area inside the border is much bigger now.
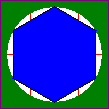 Change your foreground color to the green you used for the circle and click once with your left button.
Change back to red and go left click, right click once more.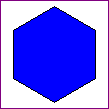
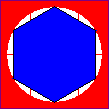
.
topSolid hexagon with no border

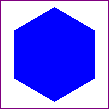 Now, if you want your hexagon to be just one color with no border at all, flood the white area with black and then with white.
.
Outlined hexagon with no fill

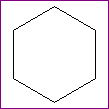 If you want your hexagon to be just an outline, with no colored fill, click white into the blue.
Now give one right click of the Flood Fill tool on the protective border to make it vanish.
Save the finished hexagon
About polygon drawing
When you are drawing a polygon, you need only drag the first line. Thereafter you just click each point and the line will follow your clicks.
An unfortunate thing about the Polygon tool is that if you have to click Undo because one line is wrong, the whole polygon disappears and you have to start again.
Oh, another thing: should you click away before the polygon is finished—say to hit File > Save—Paint will presume that that was a click of the polygon and it'll draw another line. top
A solid hexagon using the Polygon tool
Click on the color that you would like your finished hexagon to be. This is just for the time being; later you can change the color with a click of the Flood Fill tool.
 Click the Polygon tool, and choose the bottom option, which means solid shape with no outline.
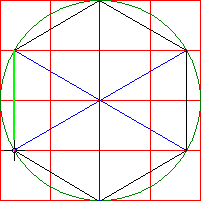
When drawing a polygon, you need only drag along the first line until you come to a corner. After that, it's only necessary to click each point to which you want the line to be drawn.
You can see the shape of the hexagon; now you are going to trace it from point to point.
Position your cursor carefully exactly on any point.
Draw a line from there to the next point.
Then, following the lines that you've already drawn, click at each corner in succession. You'll see the line follow your clicks. My line is showing as lime green.
.
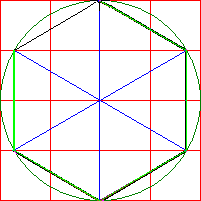
When you get to the second last corner—when there is just one line to be drawn—double click.
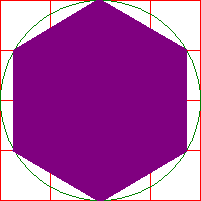 Suddenly, there's your hexagon! Clean away all the working lines and you're finished.
.
If you are going to remove the construction lines by using the Flood Fill tool, be sure to draw a protective rectangle just outside the grid before you begin.
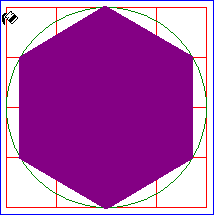
![16_hex11.gif [195*208] [806bytes] 16_hex11.gif [195*208] [806bytes]](shapes/hexstar/16_hex11.gif) As the blue lines are now hidden, blue would be a good color choice for this.
As the blue lines are now hidden, blue would be a good color choice for this.
.
Turn the hexagon
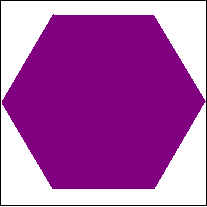
As you've made it, your hexagon has a point at the top. If you want it to have flat side at the top, do this.
- Select the hexagon with the Rectangular Selection tool.

- Draw a selection around the hexagon.
- Go to the Image menu on the menu bar.
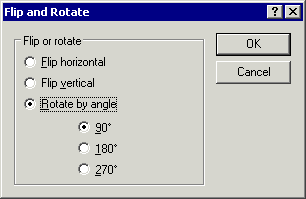
- Click on the top option: Flip/Rotate
- Choose the third option, Rotate by angle
- See that the bullet is beside 90°, then click OK. top
.
You'll be returned to the Paint window with your hexagon the way you want it.
Save your work
Using the Rectangular Selection tool, select your finished hexagon.
Go to Edit on the menu bar and choose Copy To.
In the Save dialogue, type hexagon_solid—or, if you'll be making several, hexagon_solid01.
Click the Save button.
An outlined hexagon using the Polygon tool
Click on the color that you would like your finished outline to be.
Make sure that you have white as your background color.
![]() If you'd like a heavy outline, click the line tool and click the line thickness option you want. I chose 3 pixels, the third option.
If you'd like a heavy outline, click the line tool and click the line thickness option you want. I chose 3 pixels, the third option.
 Click the Polygon tool, and choose the middle option, which means solid shape with an outline.
(If you were to choose the top option, outline with no fill, the guidelines behind would show through.)
When drawing a polygon, you need only drag along the first line until you come to a corner. After that, it's only necessary to click each point to which you want the line to be drawn. top
 So, position your cursor over one of the points of the hexagon outline you've made and drag to the next point. Then, following the lines that you've already drawn, click at each point in succession. You'll see the line following as you click.

When you get to the second last corner—when there is just one line to be drawn—double click.
.
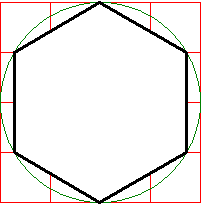
Your outlined hexagon appears, with all the inner construction lines removed! Draw a temporary blue rectangle a few pixels outside the red grid, then use the Flood Fill tool to clean away all the lines around the shape and you're done.
If you want your hexagon to have a flat side at the top, the instructions are just above, under the heading Turn the hexagon.
Save your work
Using the Rectangular Selection tool, select your finished hexagon.
Go to Edit on the menu bar and choose Copy To.
In the Save dialogue, type hexagon_blank—or, if you'll be making several, hexagon_blank01.
Click the Save button.
Finished!
Now that your hexagons have been saved separately, you can clear workspace.bmp or workspace.gif and save it ready for the next job. top
Clean your workspace
After you've copied and saved the picture, have a quick look around your workspace to make sure there's nothing else you want to copy and save. If there is something, copy and save it now, using the same Copy To procedure.
Then
Make sure that you have white as your background color.
Go to the Edit menu and click Select All.
Hit the Delete key.
Go to the File menu and click Save.
Close Paint.
Other Pictures, Problems and Procedures
Questions or comments? I'd love to hear from you, especially if you have helpful suggestions regarding any one of this set of pages. They were begun in response to some reader questions and I've arrived at solutions through trial and error. As I went over the exercises and tried to follow my own instructions, I several times saw a quicker or easier way to do something and it's likely that readers may still see some better solutions.
My email address is here.
Return to top
Drop-Down Menu from Brothercake
Everything below this is a javascript menu. If you are using a reader,
please use the links here.