Paint 24 spokes for a wheel
using a Winding symbol
 Other Pictures, Problems and Procedures
Easier spokes for your bicycle wheel
If you've successfully made a picture of a bicycle wheel, but are unhappy with its having just eight spokes, here's a way that you can make twenty-four. This method, using a Wingding character, is less exacting, but the spokes are not quite as evenly spaced as with the more precise method using a grid.
If you would like to work in Paint while you follow these directions, do remember that you can resize your browserA Browser is the program you use to visit sites on the Internet. Internet Explorer (IE) may be the browser that you use, but there are many others, such as Firefox, Opera, Google Chrome, K-Meleon and Blackbird.
You can have as many browsers as you like, and run more than one at the same time. window. If the window is maximised—taking up the whole screen—you'll first need to click the restore button (the middle one of these) ![]() , then just hover your cursor over a side edge of the browser window until a double-headed arrow appears, press your left mouse button and drag left or right until the window is a suitable size.
, then just hover your cursor over a side edge of the browser window until a double-headed arrow appears, press your left mouse button and drag left or right until the window is a suitable size.
You can then grab the browser window by the title bar and drag it to the position that you want it in. You can do this with almost any window on your computer.
Popup help from CSSplay where you'll find other amazing demos
Open workspace.bmp or workspace.gif. If you haven't made that yet, please read Your workspace file. The infomation there is important, and will make all the difference to easy working. You only need to set up the workspace once and you're all set.
Type the Wingding symbol
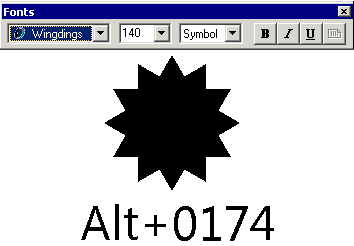
To get this:
 Click the text button and draw a big text area.
The Text Toolbar will appear.
Use the drop-down font list to change the font to Wingdings.
Highlight the size number and type in a big number.
(The picture shows the size of the symbol when I typed 140.)
Click into your text area, hold down the Alt key and type 0174 on the number pad (not the numbers along the top row of your keyboard).
Release the Alt key and the star will appear.
If nothing happens—if the star does not appear—tap the Num Lock key and try again.
(On some computers Number Lock is always ON, but on some it is always OFF. Tapping the Num Lock key toggles it from one setting to the other.)
Draw the lines
 Zoom in so that you can see the outline of the star clearly.
I found 400% (in XP, View > Zoom > Custom > 400%) best.
Diagonals
 Click the Line tool and choose aqua from the color palette.
Put your cursor right at one of the clean square corners. Hold the Shift key while you draw a diagonal down to the opposite corner. Do the same thing on the other side.
Horizontal and vertical lines
Change your color to yellow.(Using different colors helps to avoid confusion.)
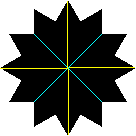
Begin from the centre; where the diagonals cross. (This Wingding seems always to have an even number of pixels at the points, so you can't choose a middle pixel to work from.)
 If the diagonals cross neatly, like this, just hold your Shift key and draw a line straight up to the top of the star. Go back to the centre and draw down to the bottom, then go from the centre to the left point and again from the centre to the right point.
.

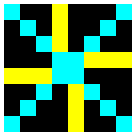 It's likely, though, that the diagonals form a block in the centre, like this.
If that's the case, stagger the starting place of the vertical and horizontal lines. This will make the drawing less off-centre than if you carried the lines straight through.
All the rest
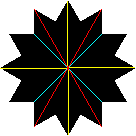
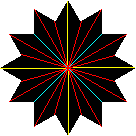 Change your line color to red. Being as accurate as you can, draw red lines from top points to lower points, and between all remaining corners, always passing through the centre.
.
Make horizontals and verticals red
Now that all lines are in place you can change the yellow lines to red.
Click on the Eraser tool. ![]()
Choose the option for the largest eraser.
Click red in the palette with your right mouse button.
Click yellow with your left button. ![]()
 Press and hold the right mouse button as you drag all over the yellow lines.
Click your right mouse button on white to change your background color back to white.
Make a protective border
.
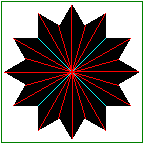
 Click on the Rectangle tool.
See that it's set to the top option, outline with no fill.
Click on a dark green.
Draw a green rectangle a little outside your black and red star. This is to stop flooded color from rampaging all over the page.
Get rid of the Wingding
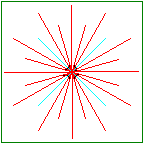 Click the Flood Fill tool.
 ![]()
Click on black with your left button.
Click anywhere between the green border and the black star, first with your left button, then with your right.
Make sure that your background color is set to white and, still with the Flood Fill tool, click with your right mouse button on the green rectangle.
Now you have just a pattern of spokes, red except for the aqua diagonals. There'll be a few odd pixels of black in the centre. You can use the Pencil tool to fix those now, or leave them for the time being.
Draw a square
Click on the Rectangle tool.
 Go to a clean space and hold the Shift key while you draw a black square about the size of the wheel the spokes are for.

 If your diagonals in the star crossed neatly, you need a square with odd-numbered sides.
If you had a block in the middle, you need an even-numbered square.
.
My square is 152x152. However, there's a small problem.
The number on the status bar is one more than the square you're drawing!
![]() So, if you want a square of 152x152, watch the status bar for 153x153. moreIf you don't believe me—and why should you, because it sounds ridiculous—draw a square and note what the status bar says, then click on the rectangular selection tool and very carefully select the square, starting exactly on its upper left corner and finishing exactly on the lower right corner. What does the status bar say? Convinced?
So, if you want a square of 152x152, watch the status bar for 153x153. moreIf you don't believe me—and why should you, because it sounds ridiculous—draw a square and note what the status bar says, then click on the rectangular selection tool and very carefully select the square, starting exactly on its upper left corner and finishing exactly on the lower right corner. What does the status bar say? Convinced?
(When holding the Shift key to control the drawing of a square, or a straight line, always release the mouse button before letting go of the Shift key.)
Draw diagonals in the square
Change your color to green and click on the Line tool.
At this stage the different colors are essential, because of flooding that you'll be doing soon.
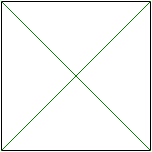
Put your cursor exactly over the top left corner of the black square and hold the Shift key while you draw a diagonal line down to bottom right.
Draw another green diagonal line from top right to bottom left.
N.B. It's important that the green diagonals are drawn before the blue circle.
Draw a circle in the square
 Change your foreground color to blue.
Click on the Ellipse tool.
Have it set on the top option, outline with no fill.
.
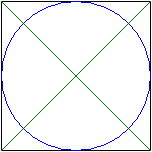
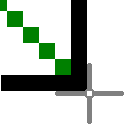 Position your cursor exactly on the top left corner of the square and drag a circle down to one pixel below and one pixel to the right of the bottom right corner, so that it meets all four sides in the same way.
.
Put the circle onto the spokes
Now click on the Rectangular Selection tool and click on the Transparency option.![]()

Draw a marquee around the black square.
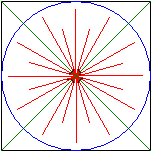 Drag the black square onto the red and aqua spokes. It's important that the square and its circle be dragged onto the spokes, not the other way around.
Wiggle the square around until the green diagonals completely hide the aqua diagonals.
.
Change your color to green and click on the Flood Fill tool.
 Left click then right click into each of the outside corners to get rid of the ends of the diagonals. Don't click anywhere inside the blue circle.
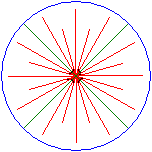 Change to black and do the same thing again. That removes the black square.
Trace and lengthen the spokes
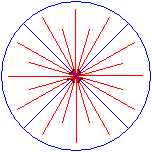
Click on the Line tool and change your foreground color to blue.
Put your cursor over the end of a green diagonal where it touches the blue circle.
Hold the Shift key while you draw a line across and down, until you reach the lower part of the blue circle.
Trace the other diagonal in the same way.
(If you prefer, you could use the color eraser, blue on right button, green on left button, to change the color of the diagonals. You do need to use the line tool for the next step, though.)
.
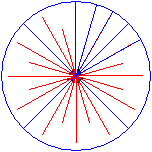
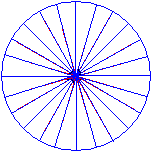
Go to the centre of the circle, where the new blue diagonals cross, and trace each red line, continuing out to the circle.
You'll find it impossible to exactly cover all the red; just try to have as few red pixels showing as you can manage.
Flood away the stray red pixels
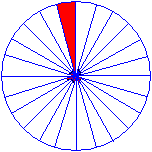 When you've traced every line, click on the Flood Fill tool and change your foreground color to red. You should have your right button color still set to white.
Click into a segment of the circle, flooding it with red.
Then right click, clearing all red from that segment, including the odd red pixels that you weren't able to cover when you traced.
Continue right around the circle, doing a left click-right click in each segment until all red has been removed except for a few dots in the centre. You now have a circle with twenty-four reasonably evenly spaced spokes.
You could now zoom right in, take the Pencil tool and tidy up the centre, but you may prefer to make a fancy hub cover.
.
Save a copy
This, of course, is the aim of the whole operation—to save a set of spokes that you can use whenever you draw a wheel.
Click on the Rectangular Selection tool and draw a marquee around your finished picture.
Go to the Edit menu and choose Copy To.
In the Save dialogue, type a meaningful name—24spokes.bmp in 98 or XP or 24spokes.gif in Vista. You may even like to add wingding or easy to the name, in case you think you'd like to try the more challenging—but more accurate—method later.
Clean your workspace
After you've copied and saved the picture, have a quick look around your workspace to make sure there's nothing else you want to copy and save. If there is something, copy and save it now, using the same Copy To procedure.
Then
Make sure that you have white as your background color.
Go to the Edit menu and click Select All.
Hit the Delete key.
Go to the File menu and click Save.
Close Paint.
Using these spokes
If you need help in incorporating these spokes into a wheel you have drawn, or if you want suggestions for making an attractive hub to cover the messy centre, directions are in attaching spokes to an existing wheel.
Other Pictures, Problems and Procedures
Questions or comments? I'd love to hear from you, especially if you have helpful suggestions regarding any one of this set of pages. They were begun in response to some reader questions and I've arrived at solutions through trial and error. As I went over the exercises and tried to follow my own instructions, I several times saw a quicker or easier way to do something and it's likely that readers may still see some better solutions.
My email address is here.
Return to top
Drop-Down Menu from Brothercake
Everything below this is a javascript menu. If you are using a reader,
please use the links here.