Attaching spokes
to an existing wheel
 Other Pictures, Problems and Procedures
Open workspace.bmp or workspace.gif. If you haven't made that yet, please read Your workspace file. The infomation there is important, and will make all the difference to easy working. You only need to set up the workspace once and you're all set.
Get the wheel and the spokes
Go to the Edit menu, choose Paste From and navigate to your saved picture of 24 spokes.
When the picture appears in the top left corner of the Paint window, drag it down a little and drag it over to the right so that there's room for a second picture.
 The Selection tool is active, so click on the bottom option to make any copies transparent.
Go to the Edit menu, choose Paste From and navigate to your saved picture of a bicycle wheel.
When the picture appears in the top left corner of your Paint window, pull it just a little down and to the right so there's room for you to select around it.
Check the colors
If you have a good eye and have no trouble matching lines precisely, leave this step out and go straight to Copy.
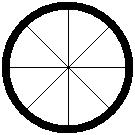

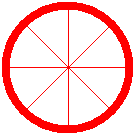
If it turns out that your spokes and your wheel are both the same color, use the Flood Fill tool and the color Eraser to make one or the other a different color.
![]() I'm choosing to make my wheel red, so I first click on the Flood Fill tool and choose red.
I'm choosing to make my wheel red, so I first click on the Flood Fill tool and choose red.
I click the red Flood Fill onto the thick part of the wheel. This changes everything but the two diagonals.
![]() Now I click red in the color palette with my right button, and click black for my left (foreground) color.
Now I click red in the color palette with my right button, and click black for my left (foreground) color.
![]() I click on the Eraser tool, press my right button while I rub over the bits that are still black.
I click on the Eraser tool, press my right button while I rub over the bits that are still black.
I then immediately click my right button on white in the color palette. top
If your wheel has thickened spokes
If the wheel that you're going to add extra spokes to has thick spokes, thicken the 24 spokes to match that thickness.
Safe copy
![]() This is to make sure that you have safe copies in case something should go wrong.
This is to make sure that you have safe copies in case something should go wrong.
With the Rectangular Selection tool, draw a marquee around the two pictures, hold the Ctrl key as you begin to drag, and bring copies down to below the originals. Click away.
Move the wheel onto the spokes
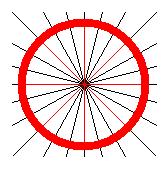 Draw a marquee around the wheel and drag it on top of the spokes. It's important that the wheel is on top, not the other way around.
The eight spokes of the red wheel should completely hide the black spokes behind them. When the wheel is properly lined up with the spokes, click away. (Should anything go wrong, you have spare copies at the top of the page.) top
Make a protective border
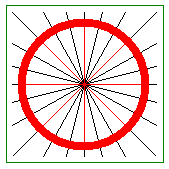
 With a different color—I used dark green—and the Rectangle tool, draw a border around your picture. Make it big enough not to touch the ends of the spokes.
.
Clean away the ends of the spokes
![]() With the color of the spokes—mine are black— as your foreground color, click on the Flood Fill tool and then click anywhere between the protective border and the outside of the wheel.
With the color of the spokes—mine are black— as your foreground color, click on the Flood Fill tool and then click anywhere between the protective border and the outside of the wheel.
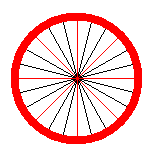 Click again with your right mouse button.
Again with your right button, click on the protective border.
Make all spokes the same color
If you're going to thicken the spokes, leave this step out.
![]() Click the color of the wheel—mine is red— in the color palette with your right button, and click the color of the added spokes with your left button.
Click the color of the wheel—mine is red— in the color palette with your right button, and click the color of the added spokes with your left button.
![]() Click on the Eraser tool and, with the right mouse button pressed, drag all over the added spokes.
Click on the Eraser tool and, with the right mouse button pressed, drag all over the added spokes.
When the wheel and all the spokes are the same color, click your right button on white in the color palette. top
Thicken spokes if you want to
It's unlikely that you'd want thicker spokes in a picture of this size, but if you do, first use the Rectangular Selection tool, outline your finished wheel and Ctrl drag a copy in case you don't like the result.
![]()
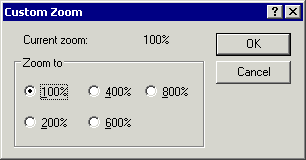 Zoom in to 4x or 6x. (To get 4x in 98 or XP, click the View menu, then Custom and mark 400%)
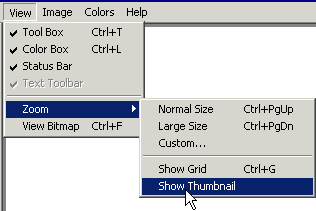 Go to the View menu, click on Zoom and then on Show Thumbnail. Drag the little window to where it doesn't get in the way of the tool palette. It'll give you an idea of the effect of your changes. If it isn't showing enough, you can resize it.
Hover your cursor over a side or the bottom until a double-headed arrow appears, then press and drag.
.
![]() Click on the Line tool and choose a thickness of 3 or 5 pixels.
Click on the Line tool and choose a thickness of 3 or 5 pixels.
(I've tried with a line thickness of 2 pixels and it's very, very hard to do nicely. Looking at the green spokes just below, you can see that they are not evenly spaced.)
Use a different color to make it easier to see what you're doing.
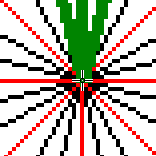 Position your cursor on the exact centre of the wheel, where the vertical and horizontal spokes intersect. top
Note the cursor position
![]() Got a pencil? A real one? Good. Press on the centre now and make a note on paper of the cursor position shown in the status bar.
Got a pencil? A real one? Good. Press on the centre now and make a note on paper of the cursor position shown in the status bar.
As you drag more lines from it, the centre is going to be covered up. If you know its position, you can find it every time. Just move your cursor around until you see those same numbers, then press.
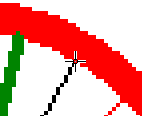 OK. First redraw your horizontal, vertical and diagonals. In each case start exactly where you started to make the single line and draw right across or right down.
Press on the exact centre of the wheel and drag to where a spoke meets the wheel. Release your mouse button, go back to the centre and do the next spoke.
The end of each line will make a blob on the circle of the wheel; that doesn't matter at all.
Work your way around the wheel until you've done all 24 spokes—or until you decide against it.
Abandon thickening the spokes?
Keep checking the thumbnail window to see if you're happy with the look of the picture as it changes. You may change your mind, and if you do you have a copy of the unchanged wheel to go back to.
However, don't give up just because the centre is starting to look messy. I'll tell you how to fix that after the thickening is finished. top




Re-color the thickened spokes
When you've thickened all 24 spokes, zoom out to normal view.
Click the Flood Fill tool, click the color that you want your wheel to be, and click anywhere on the spokes.
If necessary, click the final color onto the wheel itself as well.
Save the finished wheel
Save a copy
 Click on the Rectangular Selection tool.
Draw a marquee around your finished wheel.
Go to the Edit menu and choose Copy To.
Save the cutout as wheel2.bmp or a more specific name—wheel_with_spokes.bmp perhaps (gif if you're using Vista, of course). top
Clean your workspace
After you've copied and saved the picture, have a quick look around your workspace to make sure there's nothing else you want to copy and save. If there is something, copy and save it now, using the same Copy To procedure.
Then
Make sure that you have white as your background color.
Go to the Edit menu and click Select All.
Hit the Delete key.
Go to the File menu and click Save.
Close Paint.
Tidy a messy centre
If you feel that the centre of your wheel looks messy, as in the pictures above, you may wish to add a fancy cover at the hub.
Other Pictures, Problems and Procedures
Questions or comments? I'd love to hear from you, especially if you have helpful suggestions regarding any one of this set of pages. They were begun in response to some reader questions and I've arrived at solutions through trial and error. As I went over the exercises and tried to follow my own instructions, I several times saw a quicker or easier way to do something and it's likely that readers may still see some better solutions.
My email address is here.
Return to top
Drop-Down Menu from Brothercake
Everything below this is a javascript menu. If you are using a reader,
please use the links here.
