Make a Six Pointed Star in MSPaint
 Other Pictures, Problems and Procedures
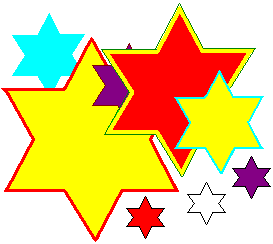
This star is so easy! Just two triangles and some tracing and flooding.
.
Windings2 character Alt+0236 is a six-pointed star.
You will also find a six-pointed star in the Shapes gallery in Paint for Windows 7.
If you would like to work in Paint while you follow these directions, do remember that you can resize your browserA Browser is the program you use to visit sites on the Internet. Internet Explorer (IE) may be the browser that you use, but there are many others, such as Firefox, Opera, Google Chrome, K-Meleon and Blackbird.
You can have as many browsers as you like, and run more than one at the same time. window. If the window is maximised—taking up the whole screen—you'll first need to click the restore button (the middle one of these) ![]() , then just hover your cursor over a side edge of the browser window until a double-headed arrow appears, press your left mouse button and drag left or right until the window is a suitable size.
, then just hover your cursor over a side edge of the browser window until a double-headed arrow appears, press your left mouse button and drag left or right until the window is a suitable size.
You can then grab the browser window by the title bar and drag it to the position that you want it in. You can do this with almost any window on your computer.
Popup help from CSSplay where you'll find other amazing demos
Open workspace.bmp or workspace.gif. If you haven't made that yet, please read Your workspace file. The infomation there is important, and will make all the difference to easy working. You only need to set up the workspace once and you're all set.
Start with a grid
Click Edit on the Menu Bar, and click Paste From.
Navigate to grid16, which you saved earlier. Click its name and click Open.
If you have not yet made it, the directions for grid16 are here.
The grid will appear in the top left corner of the Paint window. Drag it slightly down and to the right to make it easier to select.
 While the selection is still active—has little dashes around it—click the Transparency option at the bottom of the toolbox.
Draw a circle
From the color palette, choose a dark green.
Zoom in to 2x.


Click the Line tool and make sure that the top option—single pixel line—is selected.
Click the Ellipse tool.
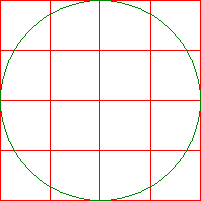 Position your cursor exactly over the the top left corner of the grid and drag to one pixel below and one pixel to the right of the bottom right corner, making a circle that touches the outside of the grid in the same way on every side.
.
Draw a triangle

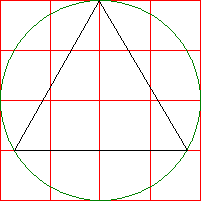 You are still zoomed in.
Click on the Line tool.
Choose black from the color palette.
Position your cursor at the point where the central red line intersects with the circle at the top.
Drag a line down to where the red line below the middle intersects with the circle.
From there, draw a line straight across to the other side.
Draw a third line from that point back to the top.
You now have an equilateral triangle.
Draw a second triangle
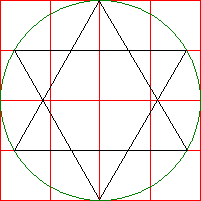 Position your cursor at the point where the circle intersects with the red line above the middle.
Draw a line down to the bottom of the middle red line.
From there, draw a line up to the point where the circle intersects with the other end of the red line above the middle.
Draw the last line straight across to your starting point.
You can see the shape of your star pretty easily now. All that remains is to pick it out from the background. top
Save this template
![]() Using the Rectangular Selection tool, select your finished star.
Using the Rectangular Selection tool, select your finished star.
Go to Edit on the menu bar and choose Copy To.
In the Save dialogue, type NAME—or, if you'll be making several in different sizes, NAME.
Make sure that the Save as type is 256 color bmp in 98 or XP or gif in Vista.
Click the Save button.
Draw the outline
![]() Now that you know where each line must start and end, you can try a thicker line. Click on the Line tool and choose a line thickness. I chose a line thickness of 3 pixels.
Now that you know where each line must start and end, you can try a thicker line. Click on the Line tool and choose a line thickness. I chose a line thickness of 3 pixels.
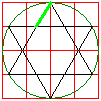 Click on a color that you'd like to use for your star. I used lime green. Of course this color can be changed when the star is complete.
 Starting at top centre, trace a black line until it meets another black line. Ignore the new line that's following your cursor; be sure to finish exactly on the intersection of the two thin black lines.
 Release the mouse button, then, with your cursor still where that line ended, press again and draw a line out to a point of the star.
.
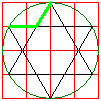
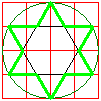 Again release your mouse button, press again and draw along the bottom of that point untill you meet another black line.
Continue in this way until the whole star is outlined with your chosen color.
Finish the star with the Flood Fill tool
![]() Click on the Flood Fill tool.
Click on the Flood Fill tool.
Begin with red as your foreground color and white as background. ![]()
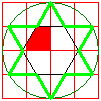
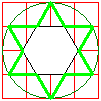 Click anywhere inside the middle of the shape, once with your left button and once with your right.
In the middle of the shape there's now a white hexagon with a black outline.
.
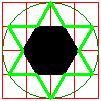 Click on black in the color palette and click with the Flood Fill tool to make that hexagon black.
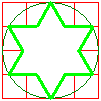 Pick up red again and flood the black, then click with your right button and you'll have an outlined star.
.
If you'd like your star to have a color fill, flood it now with the color of your choice.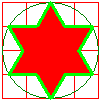
You can go ahead and clear away the construction lines.
Clear the construction lines
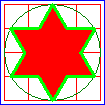 Before you start to clear anything that's outside the shape you want to keep, make a protective border so that color won't flood all over the place.
Click on the Rectangle tool. Have it set to the top option: outline with no fill.
Choose a color that isn't in the picture. I chose blue.
Draw a rectangle a few pixels outside the big red square.
.
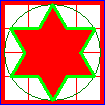
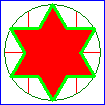 Click on the Flood Fill tool and pick up red from the color palette.
Flood the space between the blue border and the big red square with red, then click in the same place with your right button to flood that space with white.
.
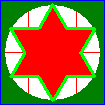
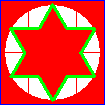 Pick up the green you used for the circle and fill with that, then again with red and last of all with white.
.
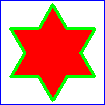
You now have a colored star with a thick outline.
If that is what you want—apart from possible color changes—your star is complete. You can click white onto the blue protective border and you've finished.
Use the Copy To procedure to save the star as a separate file.
If, however, you want to remove the edge and have just a plain star, there's one more step.
Solid star without a contrasting outline
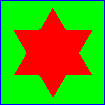
 With the blue border still in place, flood the white area with the color of the outline and then flood again with white.
The outline is gone, leaving just a solid red star.
You can now remove the protective border and save the finished solid star.
Outlined star with no fill

 If, on the other hand, you want just the outline, simply click white onto the red and you have it.
Save your star
![]() Using the Rectangular Selection tool, select your finished star.
Using the Rectangular Selection tool, select your finished star.
Go to Edit on the menu bar and choose Copy To.
In the Save dialogue, type star6_outlined, star6_solid or whatever—or, if you'll be making several in different sizes, star6_outlined01.
Don't worry about referencing color in your save name; when you want to, you can recolor in a flash.
Make sure that the Save as type is 256 color bmp in 98 or XP or gif in Vista.
Click the Save button.
.
About polygon drawing
When you are drawing a polygon, you need only drag the first line. Thereafter you just click each point and the line will follow your clicks.
An unfortunate thing about the Polygon tool is that if you have to click Undo because one line is wrong, the whole polygon disappears and you have to start again.
Oh, another thing: should you click away before the polygon is finished—say to hit File > Save—Paint will presume that that was a click of the polygon and it'll draw another line.
A solid star using the Polygon tool
Click on the color that you would like your finished star to be. Don't use any of the colors of the construction lines, though. (Should you want, say, a red star, you can change it later with the flood fill tool.)
 Click the Polygon tool, and choose the bottom option, which means solid shape with no outline.
When drawing a polygon, you need only drag along the first line until you come to a corner. After that, it's only necessary to click each point to which you want the line to be drawn.
.
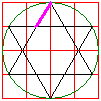
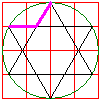
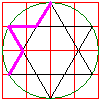 So, drag a line from the top point to the first inner corner of the star, then click on the next point.
.
Continue around the shape, clicking an inner corner and then a point, until you are almost back to your starting point.
.
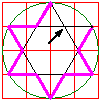
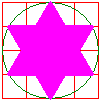
When you get to the second-last corner (where the arrow is pointing) double click.
And there's your star!
.
Click on the Rectangle tool and choose a color that is not already in the picture. Make a protective border a few pixels outside the red grid.
 Use the Flood Fill tool to clean away all the working lines and you're finished.
Save your work
![]() Using the Rectangular Selection tool, select your finished star.
Using the Rectangular Selection tool, select your finished star.
Go to Edit on the menu bar and choose Copy To.
In the Save dialogue, type star_6_solid—or, if you'll be making several in different sizes, star_6_solid01.
(If you've already used this name, change it a bit. Just adding 01, 02, etc. to file names can be a useful practice.)
Make sure that the Save as type is 256 color bmp in 98 or XP or gif in Vista.
Click the Save button.
An outlined star using the Polygon tool
Click on the color that you would like to use. Don't use any of the colors of the construction lines, though.
Make sure that you have white as your background color.
![]() If you'd like a heavy outline, click the line tool and click the line thickness option you want. I chose 3 pixels, the third option.
If you'd like a heavy outline, click the line tool and click the line thickness option you want. I chose 3 pixels, the third option.
 Click the Polygon tool, and choose the middle option, which means solid shape with an outline.
(If you were to choose the top option, outline with no fill, the guidelines behind would show through.)
When drawing a polygon, you need only drag along the first line until you come to a corner. After that, it's only necessary to click each point to which you want the line to be drawn.
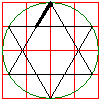
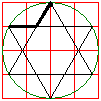
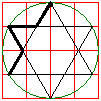
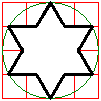
So, drag a line from the top point to the first inner corner of the star, then click on the next point.
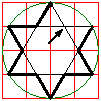
Continue like this, clicking on an inner corner, then a point, then the next inner corner and so on until you're almost back to your starting point.
When you get to the last inner corner—when there is just one line to be drawn—double click.
And there's your star!
Click on the Rectangle tool and choose a color that is not already in the picture. Make a protective border a few pixels outside the red grid.
Use the Flood Fill tool to clean away all the working lines and you're finished. top
Save your work
![]() Using the Rectangular Selection tool, select your finished star.
Using the Rectangular Selection tool, select your finished star.
Go to Edit on the menu bar and choose Copy To.
In the Save dialogue, type star6blank, or star6outlined—or, if you'll be making several in different sizes, star6blank01.
(If you've already used this name, change it a bit, of course—02 instead of 01, perhaps.)
Make sure that the Save as type is 256 color bmp in 98 or XP or gif in Vista.
Click the Save button.
Colored and bordered star using the Polygon tool
Of course there's no reason why your outlined star shouldn't have a color. We often want a yellow star, but find that it fades into the background of some pictures. Having it outlined is often the solution. You can fill the finished white star using the fill tool, and I think that's the simplest way to go about it.
However, if you'd rather do it on one step, put the fill color on your right mouse button before you start to outline your polygon.
I'm a bit wary of having color on my background button—I tend to forget about it, and then get surprising results when I try to do a Ctrl Copy/Paste. Anyway, that's entirely up to you. top
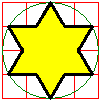


Here, I wanted a yellow star with a red border. I couldn't use red for the outline, though, because of the red grid lines. No real problem. I used black for the outline and flooded the black with red only after all the grid lines had been removed.
Finished!
Once you've cut out your stars and saved them separately, you can clear your workspace ready for the next picture you want to make. top
Clean your workspace
After you've copied and saved the picture, have a quick look around your workspace to make sure there's nothing else you want to copy and save. If there is something, copy and save it now, using the Copy To procedure.
Then
Make sure that you have white as your background color.
Go to the Edit menu and click Select All.
Hit the Delete key.
Go to the File menu and click Save.
Close Paint.
Using your stars
![]()
 When you have a picture open in Paint and want to add one of the stars you made and saved, first make sure that your Rectangular Selection tool is set for Transparent pasting, and that your background color is white.
Go to the Edit menu and click Paste From.
Find the star picture that you want and click on it.
Click Open.
You'll be returned to your Paint window with the chosen picture in the top left corner.
Put your cursor inside the marquee—the dashed rectangle surrounding the small picture— and drag it into the poition you want it in.
If the main picture is a jpg (like a photo) try to leave pasting the star until almost the last save, as each jpg save blurs edges a little, and many saves make this effect more obvious.
If you want to change the color/s of the star, do this before you save the whole picture.
Other Pictures, Problems and Procedures
Questions or comments? I'd love to hear from you, especially if you have helpful suggestions regarding any one of this set of pages. They were begun in response to some reader questions and I've arrived at solutions through trial and error. As I went over the exercises and tried to follow my own instructions, I several times saw a quicker or easier way to do something and it's likely that readers may still see some better solutions.
My email address is here.
Return to top
Drop-Down Menu from Brothercake
Everything below this is a javascript menu. If you are using a reader,
please use the links here.
