Making a Compass Rose
with MSPaint
 Other Pictures, Problems and Procedures
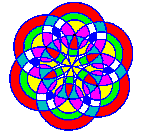
Remember those flower patterns we used to draw with a compass, then color in with Derwents or—and this came later—the gorgeous, amazingly bright colors of textas? This little exercise is just as easy, and gives much the same result. To begin with, we'll do it very simply and precisely. Further down the page you'll find interesting changes.
.
If you would like to work in Paint while you follow these directions, do remember that you can resize your browserA Browser is the program you use to visit sites on the Internet. Internet Explorer (IE) may be the browser that you use, but there are many others, such as Firefox, Opera, Google Chrome, K-Meleon and Blackbird.
You can have as many browsers as you like, and run more than one at the same time. window. If the window is maximised—taking up the whole screen—you'll first need to click the restore button (the middle one of these) ![]() , then just hover your cursor over a side edge of the browser window until a double-headed arrow appears, press your left mouse button and drag left or right until the window is a suitable size.
, then just hover your cursor over a side edge of the browser window until a double-headed arrow appears, press your left mouse button and drag left or right until the window is a suitable size.
You can then grab the browser window by the title bar and drag it to the position that you want it in. You can do this with almost any window on your computer.
Make the basic template
Open workspace.bmp or workspace.gif. If you haven't made that yet, please go to Your wokspace file. The infomation there is important, and will make all the difference to easy working. You only need to set up the workspace once and you're all set.
Draw a black square with diagonals
 Start by clicking on the Line tool in the Tool Palette. Make sure that the thickness is set to one pixel; the top one of the lines shown.
 Then click on the Rectangle tool and have it set to the top setting, which means "outline with no fill".
Have black on your left button and white on the right button.
 Hold the Shift key while you draw a square.
Hold the Shift key while you draw a square.

 The size of the square doesn't matter, except that the sides should be an odd number. Squares of odd numbers have a single pixel where diagonals cross at the centre. Squares of even numbers have a block of four pixels in that position, which would cause problems in this exercise. top
.
My square is 129x129. However, there's a small problem. Easily overcome once you're aware of it, but it had me tearing my hair for a day or two.
The number on the status bar is one more than the square you're drawing!
![]() So, if you want a square of 123x123, watch the status bar for 124x124. moreIf you don't believe me—and why should you, because it sounds ridiculous—draw a square and note what the status bar says, then click on the rectangular selection tool and very carefully select the square, starting exactly on its upper left corner and finishing exactly on the lower right corner. What does the status bar say? Convinced?
So, if you want a square of 123x123, watch the status bar for 124x124. moreIf you don't believe me—and why should you, because it sounds ridiculous—draw a square and note what the status bar says, then click on the rectangular selection tool and very carefully select the square, starting exactly on its upper left corner and finishing exactly on the lower right corner. What does the status bar say? Convinced?
The actual size doesn't matter, but keep in mind that this square will be about half the height of your finished picture.
Zoom in to 2x. Make sure that the whole square is showing in the window.
Click on the Line tool.
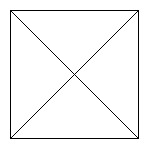 Position your cursor exactly over the top left-hand corner of the black square.
Hold the Shift key while you draw a diagonal line from top left to bottom right. Hover your cursor over the top right-hand corner and draw a diagonal line to bottom left. top
.
Draw a blue circle
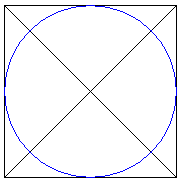 Change your left button color to strong blue.
 Still zoomed in, click on the Ellipse tool.
The "outline with no fill" option should still be selected.
Position your cursor exactly over the top left-hand corner of the black square, hold the Shift key and drag a circle down to the bottom right corner, then one pixel below and one pixel to the right of that corner, so that the meeting of circle and square is the same on all sides.

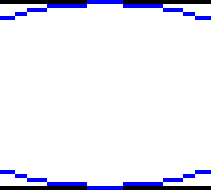
 Please note that it's unlikely that yours will be exactly the same as mine, since these directions use a square of any size. What is important is that yours be exactly the same as each other.
.
Protect the centre
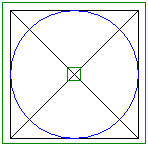
With your left button, pick up green from the color palette.
Draw a rough rectangle around the place where the two diagonals cross, and another just a bit outside the original black square. No need for precision here; these are just barriers against the flooding you're about to do. top
Clean away the guidelines
Change to the Flood Fill tool. ![]()
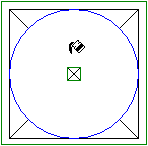
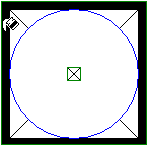
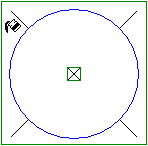
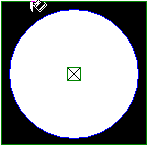
Pick up black on your left mouse button. Your right button should still have white on it. Inside the circle, click with the left button and then with the right. Do the same thing once more, and all the black should be gone from inside the circle
Move your flood-fill cursor into the space between the black square and the green and repeat the "left click, right click" procedure until all black lines have disappeared. Then pick up the green that you used for the protective rectangle, flood the area inside the green rectangle with green and then—right click—with white.
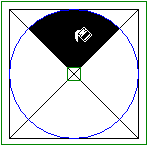
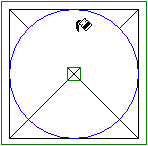
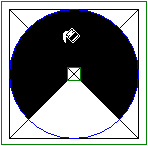
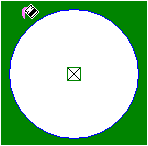
Keep the centre marked
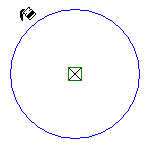 Zoom in to the green rectangle at the centre of the circle, click on the pencil tool, and use your right mouse button to remove all but the very centre pixels where the diagonals crossed. top
NB This is the centre of the blue circle, not necessarily the centre of the protective rectangle you drew around it. Don't be concerned if it looks to be off-centre in the rectangle.
 This crossing point will be five pixels forming an x as you see in the picture.
 If yours is like the picture on the right, you might like to make the centre into a solid block of 9 black pixels so that it's easier to see.
While you're zoomed in, use the pencil to remove the green rectangle.
Make a copy
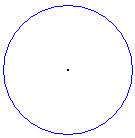 Everything you've done thus far was just to get a circle with its centre precisely marked. Now you have it, so make a copy and slide it out of the way for safe-keeping.
Copying part of a picture
 Just a refresher on copying:
Have white on your right mouse button.
Click the Rectangular Selection tool at the top of the Tool Palette.
Click the bottom icon that indicates transparency.
Draw a selection rectangle around the thing you want to copy.
Press the Ctrl key as you begin to drag the copy.
You don't have to keep Ctrl pressed once a copy has been made.
When the copy is where you want it, let go of the mouse button.
.
Copy and position
Now, forgetting about your "safe-keeping" copy, go back to the original.
![]() Select the original, press the Ctrl key, and drag a copy a little away from the original, then click on the paint bucket flood fill tool. Click your left mouse button on bright pink—or any other color except for black and strong blue—and color the original circle.
Select the original, press the Ctrl key, and drag a copy a little away from the original, then click on the paint bucket flood fill tool. Click your left mouse button on bright pink—or any other color except for black and strong blue—and color the original circle.

Brighter colors
![]()
![]() If you don't have the bright pink but would like to use it, copy and paste this color sampler and use the Color Picker tool to pick the pink from it.
(Right click on the sampler, choose Save Picture As or Save Image As to get a permanent copy, or just choose Copy and then in Paint go Edit > Paste.)
If you don't have the bright pink but would like to use it, copy and paste this color sampler and use the Color Picker tool to pick the pink from it.
(Right click on the sampler, choose Save Picture As or Save Image As to get a permanent copy, or just choose Copy and then in Paint go Edit > Paste.)
The pink circle will be the centre of your work.
 Using the Rectangular Selection tool, and making sure that the bottom—transparency—icon is selected, draw a selection around the uncolored circle.
Press the Ctrl key as you begin to drag, so that you are dragging a copy.
(If you run out of space in your window and need to move your spare copy, rather than recopying it, don't hold Ctrl when you begin to drag.)
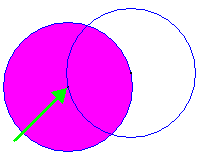 Drag this new copy to the colored circle and position it so that the edge of the white circle is on top of the centre of the colored circle.
Press and hold the Ctrl key while you briefly release the left mouse button, press it again and continue to drag.
You are now dragging a second copy. Good!
You can see that there are two places where the edges of the two circles intersect. Position your new copy so that its central dot is on one of these intersections—it doesn't matter which one.
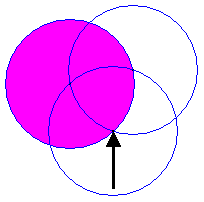
Continuing to hold the Ctrl key,briefly release the left mouse button, press it again and continue to drag. Position the centre of this new copy over an intersection of the last white circle with the colored circle.
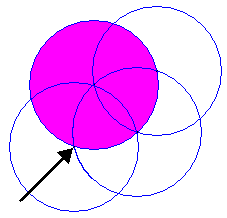
Repeat this procedure until you have positioned six blank circles around the colored one.
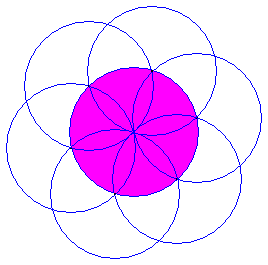
The hard work is all over. Your compass rose is complete except for the finishing touches! top
Color it in
Click on the flood fill tool. Choose any color you fancy—except the strong blue—and fill one set of shapes.
Choose a different color to fill another set, and so on.
![circles_05.gif [268*265] [3005bytes] circles_05.gif [268*265] [3005bytes]](shapes/compass_rose/circles_05.gif)
![circles_06.gif [268*265] [3355bytes] circles_06.gif [268*265] [3355bytes]](shapes/compass_rose/compass06.gif)
Smarten up the edges
If you'd like to get rid of the original blue outline, you can.
With the Flood Fill tool still active, pick up the strong blue from the Color Palette.
Fill one set of shapes with the strong blue, then fill again with the color you want to be permanent.
Only do this to one set of shapes at a time.You can see that, having finished making the central shapes strong blue, I immediately recolored them with the pink. top
![circles_07.gif [268*265] [3213bytes] circles_07.gif [268*265] [3213bytes]](shapes/compass_rose/compass07.gif)
![circles_08.gif [268*265] [2710bytes] circles_08.gif [268*265] [2710bytes]](shapes/compass_rose/compass08.gif)
When all of the edges have been dealt with, zoom in and use the Pencil tool to tidy up any spots that the flooding has missed.
That's it. Have fun!
Making a more complex pattern
Having made one, you may like to try for something taking a bit longer.
I won't make this explanation as detailed, because you have the general idea and need only a few pointers.
![compass_rose_b01.gif [185*185] [1745bytes] compass_rose_b01.gif [185*185] [1745bytes]](shapes/compass_rose/compass_rose_b01.gif) You might like to try a thicker line for your outline. If so, choose either three—the middle one of the line thicknesses offered by Paint—or five, the bottom one. This is because you will sometimes need to hover over the middle of a line, and even numbers, in this context, have no middle.
You might like to try a thicker line for your outline. If so, choose either three—the middle one of the line thicknesses offered by Paint—or five, the bottom one. This is because you will sometimes need to hover over the middle of a line, and even numbers, in this context, have no middle.
Here I've used a three pixel line and drawn my black square, my diagonals, and my blue circle.![compass_rose_b02.gif [185*185] [2273bytes] compass_rose_b02.gif [185*185] [2273bytes]](shapes/compass_rose/compass_rose_b02.gif)
That done, I zoomed in, positioned my cursor over the place where the blue circle crossed a diagonal at top left, and dragged a second circle, finishing it at the place where the blue circle crossed the diagonal at bottom right.
I then drew a third circle, starting it from the place where the second one crossed the diagonal.
After that I did everything in the same way as in the method above. With thicker lines, it wasn't quite as easy to line things up precisely.
I saw that there were different ways in which I could arrange my circles. First I tried using the triple circle as the centre, surrounding it with plain circles. top
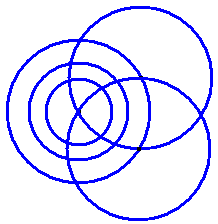
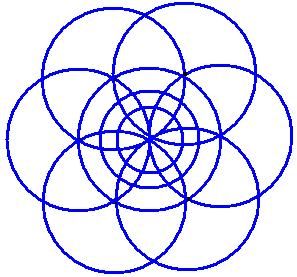
When I'd almost finished my coloring in, I decided that I'd like to have the pointy petals on the outside and do away with the outer curves.
![compass_rose_b05.gif [377*391] [6551bytes] compass_rose_b05.gif [377*391] [6551bytes]](shapes/compass_rose/compass_rose_b05.gif)
![compass_rose_b06.gif [192*170] [909bytes] compass_rose_b06.gif [192*170] [909bytes]](shapes/compass_rose/compass_rose_b06.gif) I zoomed in and, using the Pencil tool, I carefully separated the unwanted blue from the point of the pink petal.
I zoomed in and, using the Pencil tool, I carefully separated the unwanted blue from the point of the pink petal.
I did this at the point of each of the six pink petals, after which I used the Flood Fill tool and the right mouse button—set on white, of course—to remove the unwanted curves. top
![compass_rose_b07.gif [324*296] [4923bytes] compass_rose_b07.gif [324*296] [4923bytes]](shapes/compass_rose/compass_rose_b07.gif)
Even more complex—but fun!
Next, I tried using the plain circle as centre and surrounding it with copies of the triple circle. Getting those centre points exactly on intersections was harder than before, probably because of the thick lines. Anyway, the resulting outline was interesting, to put it mildly!
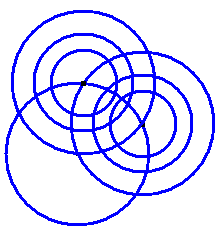
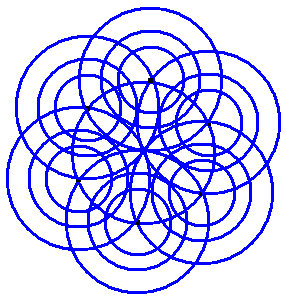
I could quickly see that I hadn't lined things up properly, but decided to go ahead with the coloring in, which took some time. top
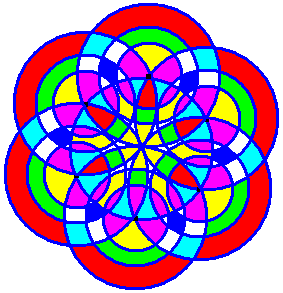
I liked the result, and thought that perhaps it might be worth making this pattern again, larger and without color, and printing it out for some little girl to color with her textas on a rainy day. Do they still do that sort of thing? I'm sure they would.
Save your work
![]() When you have an example that you like, click the Rectangular Selection tool
When you have an example that you like, click the Rectangular Selection tool
 Make sure that the transparency option is highlighted and draw a marquee around your picture.
Go to the Edit menu and click on Copy To.
Type a name into the dialogue box, check that the Save as type says 256 color bmp if you're working in 98 or XP or gif if you're working in Vista.
Click the Save button.
Clean your workspace
After you've copied and saved the picture, have a quick look around your workspace to make sure there's nothing else you want to copy and save. If there is something, copy and save it now, using the same Copy To procedure.
Then
Make sure that you have white as your background color.
Go to the Edit menu and click Select All.
Hit the Delete key.
Go to the File menu and click Save.
Close Paint.
Other Pictures, Problems and Procedures
Questions or comments? I'd love to hear from you, especially if you have helpful suggestions regarding any one of this set of pages. They were begun in response to some reader questions and I've arrived at solutions through trial and error. As I went over the exercises and tried to follow my own instructions, I several times saw a quicker or easier way to do something and it's likely that readers may still see some better solutions.
My email address is here.
Return to top
Drop-Down Menu from Brothercake
Everything below this is a javascript menu. If you are using a reader,
please use the links here.