Making faces in Windows Paint
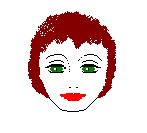 Other Pictures, Problems and Procedures
This is not about producing a work of art. It's a way to make something that can be recognised as representing a face, and sometimes that's all that's needed. Consider the cartoon symbols that we draw for cats and rabbits; they really don't look much like cats or rabbits at all, but everyone recognises them.
OK. That said, here's one way to make a recognisable symbol for a face.
If you would like to work in Paint while you follow these directions, do remember that you can resize your browserA Browser is the program you use to visit sites on the Internet. Internet Explorer (IE) may be the browser that you use, but there are many others, such as Firefox, Opera, Google Chrome, K-Meleon and Blackbird.
You can have as many browsers as you like, and run more than one at the same time. window. If the window is maximised—taking up the whole screen—you'll first need to click the restore button (the middle one of these) ![]() , then just hover your cursor over a side edge of the browser window until a double-headed arrow appears, press your left mouse button and drag left or right until the window is a suitable size.
, then just hover your cursor over a side edge of the browser window until a double-headed arrow appears, press your left mouse button and drag left or right until the window is a suitable size.
You can then grab the browser window by the title bar and drag it to the position that you want it in. You can do this with almost any window on your computer.
Popup help from CSSplay where you'll find other amazing demos
Open workspace.bmp or workspace.gif. If you haven't made that yet, please read Your workspace file. The infomation there is important, and will make all the difference to easy working. You only need to set up the workspace once and you're all set.
If you're using Paint for Windows 7, you don't need to fuss with a workspace. Cutouts can be saved through the Crop feature, and you can save in PNG format.
Start with a quick scribble
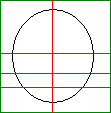
 Draw an ellipse and draw some lines where you think features should go.
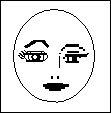
Zoom in to 6x or 8x and use the Pencil tool to scribble in some features.
![]() Don't fuss too much. Just imagine that you're doodling during a telephone call, and use a few thick lines to give a general impression of a face. The Brush is a good tool for this.
Don't fuss too much. Just imagine that you're doodling during a telephone call, and use a few thick lines to give a general impression of a face. The Brush is a good tool for this.
.
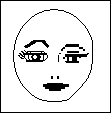
![]() Use the Curved Line tool to make the side of the face more believable. If you already prefer the features you've drawn on one side of the face, concentrate on that side.
Use the Curved Line tool to make the side of the face more believable. If you already prefer the features you've drawn on one side of the face, concentrate on that side.
![]() Click the Rectangular Selection tool.
Click the Rectangular Selection tool.
 Click the option for Transparent Copies and make sure that your background color is set to white.
.
Select one side
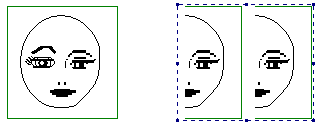
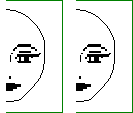 Select your preferred side of the face, hold the Ctrl key and drag a copy to the side.
Click to paste the copy and then continue to drag so that you have two copies.
Now draw a selection rectangle around both copies and drag them well away from the original. Click away to cancel the selection.
.
Flip the half picture
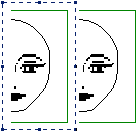
 Now select just one of the two copies.
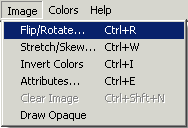
Go to the Image menu and click on Flip/Rotate.
The default item in the next dialogue box is Flip Horizontal, so just click OK.
.
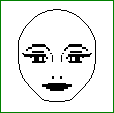
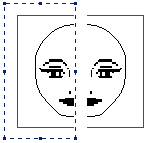 Drag the flipped half of the image to the other half and carefully make the two halves meet.
Oh dear! The face isn't too bad, but what about the eyes? Is she looking left or right?
.
.
Fix the eyes
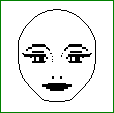
 Zoom in and use the pencil tool to fix the eyes. At the same time, fiddle with any details that are just too symmetrical.
In this picture, the two straight lines marking the bridge of the nose might be better as just a few dots.
Add some hair and adjust width
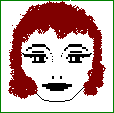
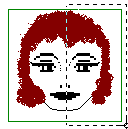
![]() Zoom out to normal view or 2x. Click on the Airbrush tool and give your face some hair.
Zoom out to normal view or 2x. Click on the Airbrush tool and give your face some hair.
Mm. This face is too wide for my liking.
With the Rectangular Selection tool, I select one side of the face and move it one or two pixels towards the middle. One of the nostril marks may then need adjusting with the Pencil tool.
Had I felt that the face was too narrow, I'd have done the opposite. I'd have pulled the selection one or two pixels away from the middle. That would've made a tiny gap all the way down the face, easily filled in with the Pencil tool. top
More little adjustments
.
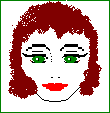
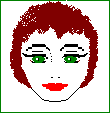 Now for some coloring in. Use colors of your choice for eyes and lips, and color the eyebrows too, if you'd like to.
Not happy with the hair? Use the Eraser tool to remove some and change the shape.
.
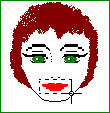
 What if you actually wanted a sad face, or a grumpy one?
Zoom in so that you can see what you're doing, click the Rectangular Selection tool, and select just her mouth.
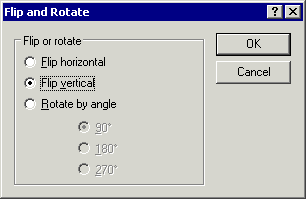
Go to the Image menu and choose Flip/Rotate.
Put a mark beside Flip Vertical. Click OK.
.
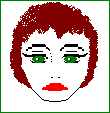
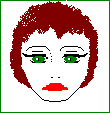 Now she's the very picture of misery!
While you're zoomed in, you might like to see what difference it makes if we make the eyebrows thinner, and perhaps lower them just a tiny bit.
.

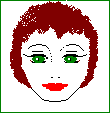 Perhaps the happy lady could have her eyebrows thinned a bit too. Beauticians pluck eyebrows from underneath, so we'll do the same thing.
OK. Not exactly Mona Lisa, but now you have the general idea you'll be making all sorts of faces! top
Save your work
![]() When you have an example that you like, click the Rectangular Selection tool
When you have an example that you like, click the Rectangular Selection tool
 Make sure that the transparency option is highlighted and draw a marquee around your picture.
Go to the Edit menu and click on Copy To.
In Windows 7, first save the big image, then select the part you want to save separately. Right click on the selection and choose Crop. Click the Paint Button and choose Save as. Type a name for the cutout and click the Save button.
Type a name into the dialogue box, check that the Save as type says 256 color bmp if you're working in 98 or XP or gif if you're working in Vista.
Click the Save button.
Do this whenever you feel happy with a picture, or feel it has potential. Save each one with a number—face01, face02, etc, or with a description—face_sad, face_laughing and so on.
Clean your workspace
After you've copied and saved all your faces, have a quick look around your workspace to make sure there's nothing you've missed. If there is something, copy and save it now, using the Copy To procedure.
Then
Make sure that you have white as your background color.
Go to the Edit menu and click Select All.
Hit the Delete key.
Go to the File menu and click Save.
Close Paint. top
Make different faces
From the same beginning scribble you could maybe make a round, innocent face ...
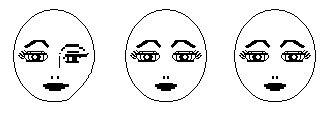
... or quite a sinister-looking one, ...
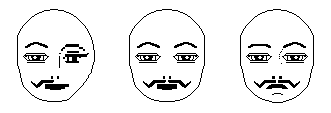
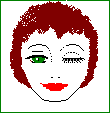
...or make lots of little changes to one picture.

Just getting it the same on both sides to begin with makes it so much easier!
Other Pictures, Problems and Procedures
Questions or comments? I'd love to hear from you, especially if you have helpful suggestions regarding any one of this set of pages. They were begun in response to some reader questions and I've arrived at solutions through trial and error. As I went over the exercises and tried to follow my own instructions, I several times saw a quicker or easier way to do something and it's likely that readers may still see some better solutions. My email address is here.
Return to top
Drop-Down Menu from Brothercake
Everything below this is a javascript menu. If you are using a reader,
please use the links here.
