Curved Rainbow Background

Return to list of Examples Return to Making Fancy Text
The directions for making a straight rainbow are here. A curved rainbow background is more complicated.
Again, you'll need a very big page. Mine is 720 x 1,016
Your background colour—your right mouse button colour—needs to be white.
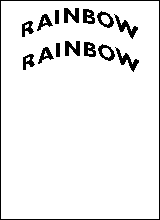 Have Text Ready
Before you begin, type or paste the text you're going to use. and copy it, so that you have two copies of exactly the same text.
If you want to make curved text, the directions are here.
Making the Curved Rainbow Background
 Click the Line tool and choose the second or third line. With the second line you can get narrower bands of colour. The three pixel line is easier to see. The one pixel line, the thinnest one, is no good, because you wouldn't be able to flood it with a different colour.
![]() Having set the line thickness, click on the Ellipse button. Choose the top option, outline with no fill.
Having set the line thickness, click on the Ellipse button. Choose the top option, outline with no fill.
Draw a Red Ellipse
Click on red and draw an ellipse almost the width of your page.
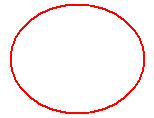 I've made my picture one quarter its true size. top
Remove the Bottom of the Ellipse
![]() Now click on the Rectangular Selection tool
Now click on the Rectangular Selection tool ![]() and turn on transparent cutouts by highlighting the lower of the two icons that appear below the toolbox when you click the Selection button.
and turn on transparent cutouts by highlighting the lower of the two icons that appear below the toolbox when you click the Selection button.
Directions for transparency in Paint for Windows 7 are here.
 Draw a selection rectangle around the bottom of the ellipse and press the Delete key. Now you just have a red arc.
Block off the Ends of the Arc
 Click on the Line Tool and click black. Draw a short vertical line at each end of the arc, just a little way in. The lines don't have to match each other.
Duplicate the Arc

 Click the Selection tool and draw a marquee around your whole drawing. Press the Ctrl key as you begin to drag downwards.
Position the copy just far enough down to not let the red lines touch each other inside the black lines. It's wise to zoom in and check this if you're in any doubt. If one or two red pixels are touching, give them a click with the Pencil Tool and your right mouse button.
Click away, then draw a new marquee around your whole drawing. Press the Ctrl key as you begin to drag the two lines downward.
Make sure that you get the top line of the copy exactly on the bottom line of the original so that you see only one line. top


 Repeat that whole operation: click away, draw a new marquee around the whole drawing, Press Ctrl and drag downwards again.
Now you have five lines and four gaps between them. Consider how many colours you intend to use. If only four, stop copying. If you're going to use more than four, carry on.
Colour the Rainbow
Click the Flood Fill Tool, and choose any colour other than red or black.. If you want the top band to be red, you can change it after you do this first flooding.
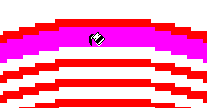
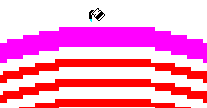 Click the Flood Fill Tool into the top white band, and onto the red line below it.
Now right click on the very top line, so that it vanishes. This ensures that each band of colour will be of equal height.
Note. It's important that the top band is filled before the top line is removed.

 Proceed in the same way with other colours. Fill the white band, and then the line immediately below it. top
Duplicate the Coloured Part
When you've used all the colours you intend, stop flooding. It doesn't matter at all if you have some empty bands below the coloured area; they'll be covered up.
Zoom in a bit; 2 x should be enough. Click the Rectangular Selection Tool and draw a marquee around your whole drawing, including both filled and empty bands.

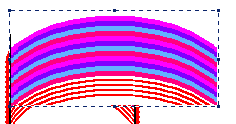
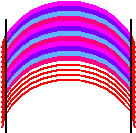 Press the Ctrl key as you begin, and drag the copy down so that the top coloured band fits exactly into the first white band.
O.K. As already said, the extra lines don't matter. This is just a background for masked text. Drag down another copy and position it in the same way.
Continue until the height of the coloured part is a bit greater than the height of the text.
Stretch if Necessary
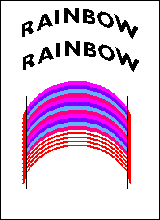 Since your original ellipse was of full page width, this background should be wide enough for the text with which you're going to use it. However, if you see that it's not quite wide enough, stretch it.
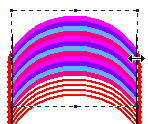
Draw a marquee around the useful part of the rainbow background.
Hover your cursor over the little block in the middle of one side until you see a double-ended arrow.
Press the mouse button and pull sideways until the background is a little wider than your text. You can do all the stretching on one side, or a little on each side, whichever you find more convenient. top
.
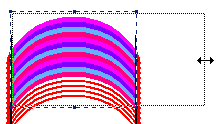
Now proceed to fill your text with this background, as explained in the step-by-step directions for using a Mask.
Return to list of Examples Return to Making Fancy Text
Questions or comments? I'd love to hear from you. My email address is here.