Rainbow Text for Headings

Rainbow lettering like this heading is very easy and quick to make.
Directions for a curved rainbow background are here.
Return to list of Examples Return to Making Fancy Text
You'll need a big page—wider than your intended text, and deep enough to have scroll bars. My page was 720 x 1016.
Draw Straight Lines
 Click on any colour you fancy and hold the Shift key while you draw a straight line.
Click on a different colour and draw another straight line right below it and touching it. It doesn't matter if there's a bit of overlap, but don't allow any white between the lines.
 Keep changing colours and drawing lines until you've used all the colours you want.
Duplicate the Lines
Now click the Rectangular Selection tool and the transparency icon below the toolbox.
![]() These two little icons, which appear conveniently when you click on the selection tool, control transparency. With the bottom icon highlighted, as shown here, your selection will be transparent.
These two little icons, which appear conveniently when you click on the selection tool, control transparency. With the bottom icon highlighted, as shown here, your selection will be transparent.
If you're using Paint in Windows 7, here are directions for turning on transparency.
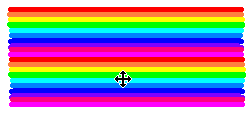 Draw a selection rectangle around your block of colours. Hold the Ctrl key as you begin to drag the selection downwards.
This block should be deep enough for most font sizes, but ig you want more depth, tap the Ctrl key again and drag another copy down.
Click away to cancel your selection, then draw a new selection rectangle around the whole big block of colours. top
 Stretch the Block of Colours
There's a little block half way down the side of the selection marquee. Hover your mouse over it until the cursor schanges to a double-ended arrow. Then press and pull to make the selected area wider.
Type Your Heading
If necessary, select the stretched block and drag it further down the page to make enough space to type your heading.
Click on the Text Tool and click on black.![]()
![]() Set your options in the Text Toolbar. It's a good idea to use Bold for this.
Set your options in the Text Toolbar. It's a good idea to use Bold for this.
Your choice of font-size is not limited to the sizes shown in the drop-down list of sizes. You can type in any size you please. I used 80 for the text at the top of this page.
Draw a text box above your colour block and type your text. If the box you've draw isn't wide enough, as happened here...
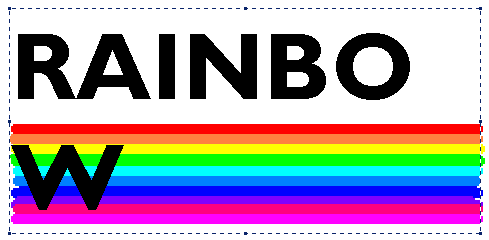
...you can stretch the text box just as you did the colour block. The text won't be stretched; you'll just have more space for your letters. (I was lucky enough to have room underneath for the text to wrap. If there's no room in either direction, you'll most likely get a warning sound from Windows. Just stretch the text box anyway. All will be well.) top
Adjust the Colour Block to Match
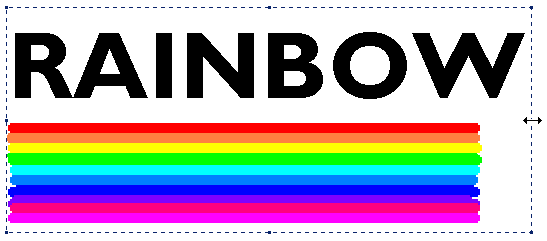
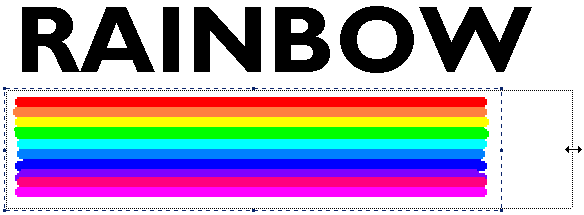
When you've finished the typing, Click again on the Rectangular Selection Tool, select the colour block and stretch it until it's definitely longer than the line of text. top
Invert Text Colours
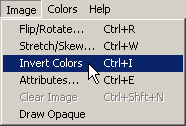
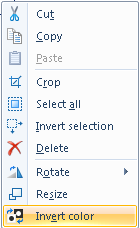 Now draw a selection marquee around just the text you typed.
Go to the Image menu and choose Invert Colors.
In Windows 7, right click on the selection itself and choose Invert color.

.
You are going to drag this black mask onto the block of rainbow colours.
Hold the Ctrl key as you begin to drag. You're dragging a copy of the typing and leaving the original for later use.
Drag the copy down onto the colour block so that you can see colour shining through all the white letters. top

Clear the Mask
![]() Click the Flood Fill paint bucket button and, with white as your background colour, right click on the black oblong around the letters. Right click into each black space inside the letters, too.
Click the Flood Fill paint bucket button and, with white as your background colour, right click on the black oblong around the letters. Right click into each black space inside the letters, too.

Pick up a Copy of the Rainbow Text

Draw a selection marquee inside the white oblong, but outside all of the letters.
Press the Ctrl key as you begin to drag a copy. At this stage the heading looks a bit insipid and some colours get lost against a white background.
Drag the copy to the spare line of black text and place it almost, but not quite, on top of it, allowing just an edge of the black to show on either the left or the right. This gives the heading more definition. top

Transparency in Windows 7 —Image Menu—Select
![]()

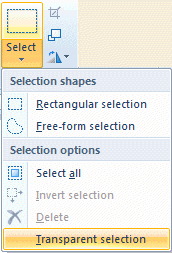 Depending on the size of your window, the Image Menu will look like one of these. When you click the down arrow just below the dotted rectangle, or just below the word Image, a menu will offer you further choices.
Before you can use the buttons on the right of this menu, you select the part of your drawing that you want to work with.
Transparent selection
 At the bottom of the Select menu you'll see Transparent selection. You'll want to use this often, so it's a good idea to add it to your Quick Access toolbar. To do this, right click on Transparent selection and then click on Add to Quick Access toolbar.
On your Quick Access Toolbar, there'll be a checkbox in front of the words Transparent selection. ![]() While that box has a tick in it, selections will be transparent.
While that box has a tick in it, selections will be transparent.
To make your selections opaque, just click the checkbox to remove the tick.
Return to list of Examples Return to Making Fancy Text
Questions or comments? I'd love to hear from you. My email address is here.