Masks for Fancy Lettering

Summary of Mask Method
- Type your text in black
- Copy your typed text
- Make a fancy background somewhat bigger than the text will be
- Select the text and invert the colours
- Put the masked text onto the background
- Flood the mask with white
- Copy the decorated heading
- Add a shadow or outline
- Save your finished work
Step by Step
In these directions, I haven't said "Save" except right at the end. Please do save your work as you go, though. It doesn't matter what you call it, perhaps masks.bmp. This working file will be big, but it can be deleted when you no longer need it.
Type Your Text in Black
 Click the Text tool and draw a text box.
Choose font and size. If necessary, type in a size that isn't offered on the list. Click the B bold button
Using black, type your heading text. I used Garamond size 80.
Copy the Heading
 Click the Rectangular Selection tool.
Highlight the Transparent Selection icon under the toolbox.
Directions for finding the transparency option in Paint for Windows 7
Make sure that you have white as your background color.
Draw a marquee around your typed heading, press the Ctrl key and drag a copy down the page. One lot of text is for making the mask, the other is for the shadow you'll add later. top
Prepare the Fancy Background
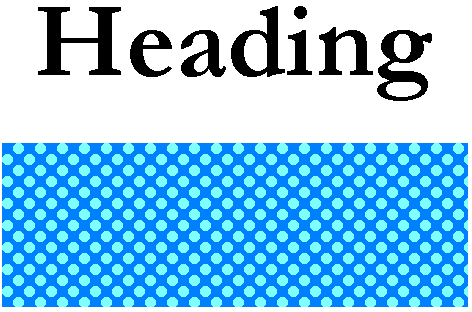
The background might be a snip from a photo or it could be a pattern of some kind.
Make the background strip longer and deeper than your typed text and position it below the copy you dragged down.
Select the Text and Invert the Colours
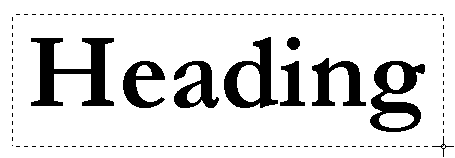
Now click the rectangular selection tool and outline one lot of text. This selection shouldn't be tight; allow some margin all around.
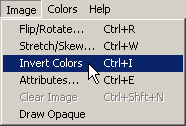 Go to the Image menu and click on Invert Colors. It's important to have an active selection when you do this, otherwise everything on the page would have its colors changed. top
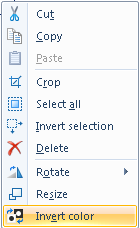
In Windows 7, right click on the selection itself and choose Invert color.
You should now have white text on a black background.

This is your mask.
Put the Masked Text onto the Background
Drag the mask down onto the coloured background strip.

Flood the Mask with White
Click the Flood Fill tool and right click on the black rectangle. Then right click on any enclosed spaces in the letters. top

Make a Copy of the Decorated Heading.
Click the Rectangular Selection tool. Draw a marquee inside the white rectangle, taking care not to touch the lettering.

Press the Ctrl key and drag a copy of the decorated heading to a free space. Copying is wise at this stage, just in case you're not happy with the results of the next step. top

Add a Shadow
At the top of the page you have a spare copy of the typing. Scroll up if necessary and draw a selection marquee around it. Click Edit > Copy.
Move back down the page to your decorated heading, click Edit > Paste and position the copied plain heading in a free space.
Choose a colour that is different from the colours in the decorated heading. Click the Flood Fill tool and recolour the plain heading.

Pick up the decorated heading and position it almost on top of the plain heading so that the plain colour shows on one side. top

Or an Outline
Outlining text is a more complicated process. The directions for outlining text are here.
Save Your Work
In 98, XP or Vista, if you want to keep your working image, save it now.
Draw a selection marquee around the finished heading.
Go to the Edit menu and choose Copy to.
Type a name for your heading cutout and click the Save button.
In Windows 7, if you want to save your whole page, save it now, then right click on the selected area and choose Crop from the menu that appears.
![]() Click the Paint button, choose Save as and type a name for your heading.
Click the Paint button, choose Save as and type a name for your heading.
If you do not want to save the working page, just right click on the selection, choose crop and then click Save on the Quick Access tool bar.
Since this heading is intended for printing, and it is not going to be included in an email, you should worry about quality rather than disk size.
Transparent selection Windows 7
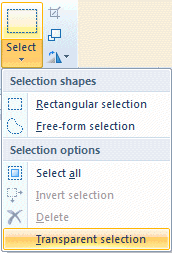
 At the bottom of the Select menu you'll see Transparent selection. You'll want to use this often, so it's a good idea to add it to your Quick Access toolbar. To do this, right click on Transparent selection and then click on Add to Quick Access toolbar. On your Quick Access Toolbar, there'll be a checkbox in front of the words Transparent selection.
 ![]() While that box has a tick in it, selections will be transparent.
While that box has a tick in it, selections will be transparent.
To make your selections opaque, just click the checkbox to remove the tick.
Go back to Copy the Heading Go back to List of Examples
Questions or comments? I'd love to hear from you. My email address is here.