Text on a Curve

Return to list of Examples Return to Making Fancy Text
Vector drawing programs, like Illustrator and Inkscape, offer "Text on a Path". MSPaint is just a bitmap paint program, but with a bit of fiddling we can at least set a heading on a curve.
The background of the heading above was made according to the directions given for a curved rainbow background. A masked background isn't necessary, of course. You may wish to just curve a word and leave it at that.
Although my example uses an upward arc, once you have the idea you can fiddle and get different results for projects you have in mind.
Limitations
It isn't easy to judge the amount of skew each letter needs. Trial and error is the only way to get there.
Make it Easier
Have a really, really big page, so you have lots of space to leave a copy after every move.
While playing with this idea, copy things. You'll often want to go back and start again, and doing things the second time is a waste of time and just plain boring.
Make a Fresh Selection after Copying
I've found that if I drag a copy of something and skew the copy, then hit Undo, not only does the copy vanish, but so does the thing I copied from.
Therefore, after you drag a copy, click away to cancel your selection, then draw a new marquee around the thing you're going to skew. top
How to Make the Curved Text
Whenever you're going to play around with individual letters, type your word letter space letter space letter. This makes it much easier to select individual letters without resorting to the Free-form Selection Tool.
Instead of typing

type

Each letter can then be easily selected, copied and manipulated.
Skew
Changing the angle of each individual letter is done through the Stretch and Skew dialogue.
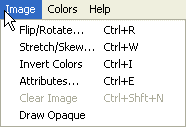
The way you open the Resize and Skew dialogue differs according to your operating system. From 98 through Vista, click the Image menu and then Stretch and Skew. top

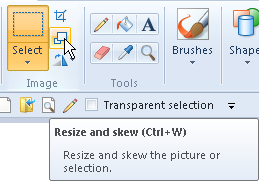
 In Paint for Windows 7, the second tiny button to the right of the large Select button on the Image menu will open the Resize and Skew dialogue.
.
Looking at the Skew Options
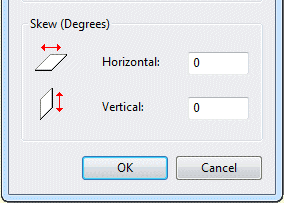
 Since we're not concerned with the Size part of this dialogue, we'll look just at the bottom part, Skew.
In this instance, we will use only the lower option, Vertical.
Working from the centre, each letter to the left needs an increased skew angle.
Working from the centre, each letter to the right needs a decreased skew angle.
.
Skew Each Letter Individually
Select each letter individually and Ctrl drag it to a position below the line of spaced text. It's important to leave the original and drag a copy, click away to cancel the selection and then select the copy again.
Don't worry about setting your skewed letters in a straight line, but leave them spaced out so they'll be easy to select. top

Begin at the middle of the word—the middle of its length, not the middle of the number of letters.
This is just an example. These degrees of skew worked for the letters in this word. Had all the letters been of equal width, I would've seen the R as the middle of the word and left it completely unskewed. Because the I takes up so much less space, I had to imagine the middle as being between the N and the R.
As you move away from the middle, increase the amount of skew for each letter.
Skew the Other Way
You want the letters to the right of centre to slope the other way, so you'll type minus values. Again, work from the middle and decrease the amount of skew for each letter to balance those on the left.
Make a Guideline
Click the Line tool and choose the second or third line thickness.
Click the Ellipse tool and choose the top option: outline with no fill.
Click on red in the palette.
Below the skewed letters, draw a red ellipse. If it's taking up too much space, select and delete the bottom half of it. You only want an arc on which to sit the letters.
Starting with the middle letter or letters, select each one and drag it down to sit on this guideline. Try to make the spacing the way it'd be in a word on a straight line.

Click the Flood Fill tool. Right click on the red arc to remove it.
If the skewing has left whiskers—odd pixels sticking out—you may like to zoom in and use the Pencil tool to tidy up. top
Use the Curved Text as a Mask
To fill the curved word with a pattern, make a Curved Rainbow Background and use the Mask directions.
.
Return to list of Examples Return to Making Fancy Text
Questions or comments? I'd love to hear from you. My email address is here.