Suggestions for Text Backgrounds
Supplementary to Masks
Return to list of Examples Return to Making Fancy Text Masks step by step
On This Page
Part of a Photograph as Background Ocean Spraycan Example Stretched Spray Pattern Background Massed Flower Background About White in Backgrounds
Part of a Photograph as Background
Pine Foliage

A small snip from a close picture of a radiata pine made a background for this heading.
Ocean

This was made using a snip from a seaside picture as the background.
I cheated a bit here. I opened the photograph in IrfanView, clicked Enhance Colours on the Image menu, and increased the strength of the blue in the picture.
Spraycan Example

Using the spray can and the widest spray, I chose autumn colours and made a small patch of spray about the height of the intended text. I selected it and went Ctrl drag click until the piece was long enough. Then I selected the whole thing and held Shift while I dragged it around just a little, mainly to get rid of most of the underlying white.
When the text was finished, though, there were still a few odd pixels of white. Where they were right on the edge, they caused a ragged appearance, so I zoomed in and used the pencil to colour them. top
Stretched Spray Pattern Background
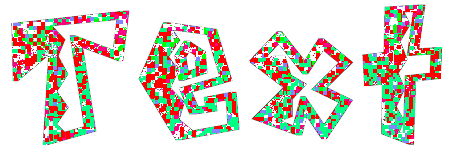
 I used the spray can for this one too. I sprayed a few colours, then selected the sprayed area, grabbed it by one corner and stretched until I had the width I wanted. I stretched it down a bit as well until I had the necessary height. Each pixel of colour became a block.
Add an Outline
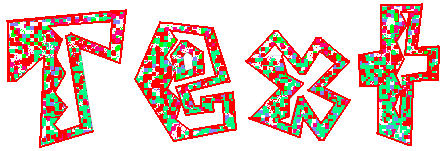
Since this font has lots of straight lines, I thought it'd be fairly easy to give it an outline by hand. With curves you'd have to proceed pixel by pixel or make the outline in a more formal way, but this took hardly any time. I used the line tool set on two pixels so that the outline would show up. The result is a bit jaggy, though.
There are directions here for outlining any text.
Change the Colours
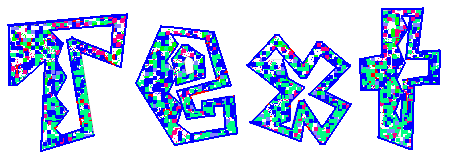
I thought that this was an interesting font and wanted to play a bit more, so I put a strong blue onto my right mouse button, kept red on the left one, clicked the eraser tool and rubbed around the edge of each letter with the right button depressed. top
Massed Flower Background

![]() This one is my favourite, and lots easier than you'd think. I just selected this little group of flowers and held the Ctrl key while I dragged and clicked repeatedly. I did not try to get the pattern “even”. Once I had a big block of flowers, I continued with the text mask part of the operation.
This one is my favourite, and lots easier than you'd think. I just selected this little group of flowers and held the Ctrl key while I dragged and clicked repeatedly. I did not try to get the pattern “even”. Once I had a big block of flowers, I continued with the text mask part of the operation.
![]() If you want to use these flowers, you can zoom in and change the colours to your own preference. Just don't use white, though.
If you want to use these flowers, you can zoom in and change the colours to your own preference. Just don't use white, though.
About White in Backgrounds
Because one stage in using a background with a mask involves flooding that background with white, the white in the background would make the edges of the letters look eaten away.

If you do want some white in a pattern, use another colour in its place until you've done everything else, including outlining on all four sides.
Then use the colour rubber ![]() (white on right button, temporary colour on left button, drag over the picture with the right button pressed down) to change it.
(white on right button, temporary colour on left button, drag over the picture with the right button pressed down) to change it.
![]()

This makes quite a bit of extra work. If you're sure you want to use white, here's how to outline your text.
Return to list of Examples Return to Making Fancy Text Masks Step by Step
Questions or comments? I'd love to hear from you. My email address is here.