Draw a Flower with Helios Paint
Getting Started with Helios Paint Fancy Text with Helios Paint
Check the Size of Your Canvas Start by Saving Turn off Antialiasing Open the Colours and Paints Palette and Choose a Specific Colour Draw an Outlined Shape Local Fill with the Paint Can The Neighbour Rule Using Exactly the Same Colour Again Draw a Solid Heart Shape Copy the Heart Shape Wand Selection Rotate the Copied Heart Shape A Fresh Copy and a New Rotation Move Pieces to Tidy the Work Space Lasso Selection Copy and Mirror the Rotated Hearts Move the Star Tidy Edges Zoom in for a Close View Enlarge Your Window Position Your Picture in the Zoomed Window Zoom to Normal View Lasso Options Make it Smaller Copy Change the Colour of the Flower RGB Filter Darker Colours HSL Filter Luminance Hue Export the Original Big Flower Use the Eraser to Clear Your Canvas Restore the Yellow Centres
 Back to Getting Started with Helios Paint: Colours & Effects
Hearts and Flowers
This exercise is very long and detailed. Please don't be daunted. The aim of the exercise is to introduce several tools and their uses, and the details make the exercise look longer and more complicated than it really is.
Check the Size of Your Canvas
Open Helios Paint. Look at the Title Bar. If you see (600 x 400) or something greater, proceed.
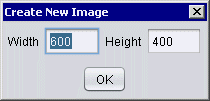 If the numbers shown in the Title Bar are less than 600 x 400, click the New button
 ![]() in the Top Toolbar.
in the Top Toolbar.
In the small dialogue box that pops up, type 600 in the first place and 400 in the other. Click OK.
.
While writing this page, I found the 600 x 400 size rather smaller than I'd've liked, so do go for a bigger size if it's convenient.
Start by Saving
Click the Save button ![]() on the Top Tool Bar. Type a name for your practice image and accept the png format. So, practice.png. Click the Save button in the dialogue box.
on the Top Tool Bar. Type a name for your practice image and accept the png format. So, practice.png. Click the Save button in the dialogue box.
Every so often, while you are working, click the Save button in the Top Tool Bar top
Turn off Antialiasing
.
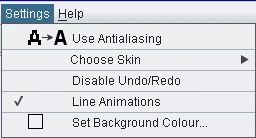 Now, go to the Menu Bar and click Settings.
The top item is Use Antialiasing. For this exercise, you do not want to use antialiasing. Antialiasing smooths edges by fading the edges of an object with variations of the main colour, and this interferes with colouring in.
If there's a tick beside Use antialiasing, click it.
If there is no tick, just click somewhere else on the canvas and allow the Settings Menu to close.
Open the Colours and Paints Palette and Choose a Specific Colour
 If you do not have the Colours and Paints Palette open, click the Colours and Paints button
 ![]() below the Toolbox.
below the Toolbox.
.
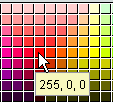 In the Colours and Paints Palette, with the bullet in Normal Colour, hover your cursor over various shades of red until the tooltip says 255, 0, 0. Click that colour, which is pure red. top
Draw an Outlined Shape
Click on the Shapes button ![]() in the Toolbox.
in the Toolbox.
Shapes Options will appear below the canvas. Click the down arrow on the end of the Shape box. A list of shapes will drop down. Click on 5 point star.

Set the options as shown here. Line, Rotation 0, Width 1. If necessary, click the down arrow beside Dash and make sure that the top option—a plain, unbroken line—is selected.
Ignore the Rounding, Joint and End options.
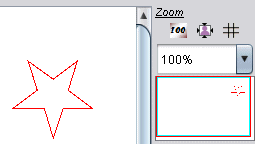 Put your cursor in the top right-hand part of your canvas. Hold the Ctrl key while you drag down and to one side to make a star about the size of that shown here. Look at the controls to the right of the canvas to get an idea of size. A little bit bigger or smaller is fine.
The star will look to be upside-down. That's how we want it.
Local Fill with the Paint Can
Click the Paint Can ![]() in the Toolbox.
in the Toolbox.

Set the options for the Paint Can to Local Replace, Fill by RGB, Neighbour Rule full on.
The Neighbour Rule
Having the Neighbour Rule full on ensures that colour will flood even into pixels that only touch at their corners. If the Neighbour Rule looks like this ![]() , click it once and it will change.
, click it once and it will change.
 In the Colours and Paints Palette, with the bullet in Normal Colour, hover your cursor over various shades of yellow until the tooltip says 255, 255, 0. Click that colour, which is pure yellow.
Click in the white middle of the red star. top
 You should now have a yellow star with a thin red outline.
Click the Save button in the Top Toolbar
Using Exactly the Same Colour Again
 You will notice that to the right of the main Swatches Palette there's a much smaller palette labelled Recent. This keeps a record of the colours you use in a session. (The larger Recent Paints Palette also shows these, but it really comes into play when you've been using Textures.)
When you close Helios Paint, the Recent palettes will be cleared. When this is the case and you want to be certain of using the same colour exactly, click the Colour Grabber button ![]() in the Toolbox, click on the desired colour in your picture, then click the button of the tool you want to use.
in the Toolbox, click on the desired colour in your picture, then click the button of the tool you want to use.
Click on the red in the Recent Palette.
Draw a Solid Heart Shape
Click the Shapes button in the Toolbox.
In the Options panel, click the down arrow and choose the heart shape, which is at the bottom of the list.
Change the bullet from Line to Fill.
 Somewhere to the left of your star, press your mouse button and draw straight up until you feel that the shape you're making is about the same height as your star. Press and hold the Ctrl key. A red heart will spring out. If you're not happy with the size, continue to hold the Ctrl key and move the mouse up or down a little.
Copy the Heart Shape
Click the Select button ![]() in the Toolbox. top
in the Toolbox. top
Wand Selection

Choose the options shown here. First, click the Wand Selection Tool, which selects by colour. See that the Select by box says RGB. If it does not, use the drop-down arrow to show a list, and click RGB.
Put a bullet beside Copy and beside Local Select.
Make sure that the slider under RGB is at the left end of the scale.
The Neighbour Rule should be full.
Click on the red heart and drag a copy to a clean spot.
Rotate the Copied Heart Shape
While the copied heart shape is still selected, click the Transform Tool ![]() in the Toolbox.
in the Toolbox.
 Click the Rotate tab to bring it to the front.
There are some preset rotations at the top. None of them is suitable for what we're doing. We want to make a five petalled flower. A circle is 360°. A fifth of that is 72°, so type 72 into the bottom box and click the Rotate button ![]() . Click the Selected button
. Click the Selected button![]() to cancel your selection.
to cancel your selection.
Click the Save button in the Top Toolbar
A Fresh Copy and a New Rotation
If things are rotated many times they may lose some definition, so it's a good idea, wherever possible, to apply further transformations to copies of the original, rather than to copies of copies of copies. top
Repeat the Copying operation
Go back to "Copy the Heart Shape and repeat the steps.
When you've made the copy and while it's still selected, click the Transform button in the Toolbox.
Change 72 to 144. Click the Rotate button ![]() . Click the Selected button
. Click the Selected button![]() to cancel your selection.
to cancel your selection.
Move Pieces to Tidy the Work Space
When you want to Move a selection without leaving the original, you should change the Copy option to Cut.
Click the Select button ![]() in the Toolbox.
in the Toolbox.
Lasso Selection
The Wand Tool is probably still highlighted. Change to the Lasso Selection Tool ![]() . This tool works better than the Wand on shapes that have been transformed and so may have somewhat furry edges.
. This tool works better than the Wand on shapes that have been transformed and so may have somewhat furry edges.
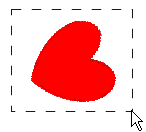 With the Lasso Selection Tool, you draw a marquee outside the thing you want to select.
When you release the mouse button, the marquee leaps in to embrace the selected object.
Use the Lasso to select one of the rotated heart shapes and move it up to somewhere near the top of the canvas.
Cancel the selection, then select and move the other rotated heart. Leave space between the shapes so that it'll be easy to select each of them later.
 You should now have something like this on an otherwise empty cavas.
.
Copy and Mirror the Rotated Hearts
We have three petals for our flower. We need two more, and to make these we'll copy and mirror two of those we've made already. top
Copy the Two Rotated Hearts
Click the Select button ![]() in the Toolbox.
in the Toolbox.
 This time, click on the scissors symbol, which is the Cut Shape button. Make your settings agree with these, with a bullet beside Copy.
The Cut Shape that you need is the Rectangle. If necessary, choose it from the drop-down list.
When you use a Cut Shape selection, there will be an opaque area between the selection marquee and the object or objects you're selecting. For our present purposes, that's fine.
Draw a selection marquee around the two rotated hearts and drag a copy further down the canvas.
Mirror the copy
While the selection is still active, click the Transform button![]() in the Toolbox.
in the Toolbox.
 Click the Flip tab to bring it to the front.
Click the left of the two buttons—Flip horizontally.
The selection is flipped immediately. Cancel your selection.
Move the Star
Now click the Select button in the Toolbox again. Put a bullet beside Cut.
Use the Cut Shape Selection tool to drag the star down into a clear space on your canvas.
Make sure that there's enough space around it to fit the heart-shaped petals.
Move the Petals
Change back to the Lasso Selection Tool
White margins would make the next step impossible, so click the Lasso Selection Tool. Leave the Cut Copy bullet in Cut.
 Draw a selection marquee around your original upright heart shape and drag it down to the top corner of the star. Position it so that it almost hides the tips of the star's points on either side.

Click on an empty part of the canvas or click the Selected button ![]() to cancel your selection, then draw a marquee around the next heart-shaped petal. top
to cancel your selection, then draw a marquee around the next heart-shaped petal. top
.
 It's fairly easy to see which petal slots into which part of the star, so select petals in "around the clock" order and drag each carefully into position.
After positioning each petal, click the Selected button or click on the empty canvas to cancel the selection before selecting the next one.
When all five petals have been dragged into position, your picture will look like this.
.
Tidy Edges
You'll see that there are a couple of places where individual pixels stick out from the edge of a petal.
Zoom in for a Close View
Press on the little Zoom-in button ![]() just below the Navigation Thumbnail.
just below the Navigation Thumbnail.
The picture will zoom towards you.
Enlarge Your Window
![]() If your window is not big enough to comfortably fit the zoomed view, you can drag a corner to make it bigger. Hover your cursor over a bottom corner until you see a double-ended arrow, then press and drag out and down. You can also enlarge the window to full screen by clicking the Maximise button
If your window is not big enough to comfortably fit the zoomed view, you can drag a corner to make it bigger. Hover your cursor over a bottom corner until you see a double-ended arrow, then press and drag out and down. You can also enlarge the window to full screen by clicking the Maximise button ![]() at top right, and bring it back to your preferred size by clicking the Restore button
at top right, and bring it back to your preferred size by clicking the Restore button ![]() in the same position.
in the same position.
If you go to the Full Screen View available from the Tools Menu, press the Esc key to return to normal view.
Position Your Picture in the Zoomed Window
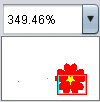 When the picture disappears from your window, drag the Navigation Window so that it includes the part you need to look at.
 You could also get your picture centre-screen by dragging scroll bars, but I think you'll find the navigation window more direct.
When you have a clear view of the offending pixels, click on the Pencil Tool ![]() in the Toolbox.
in the Toolbox.
In the Colours and Paints Palette, click on white, which is in the top left corner.
With the white Pencil, click on each pixel that you feel spoils the outline.
If you make a mistake and accidentally put a whie spot onto a petal, click the Undo button ![]() on the Top Toolbar.
on the Top Toolbar.
If you think that you need to fill in a missing red pixel, click the Colour Grabber ![]() in the Toolbox and click on the red in your picture. Then click again on the Pencil in the Toolbox and click into the place you think a red pixel is needed.
in the Toolbox and click on the red in your picture. Then click again on the Pencil in the Toolbox and click into the place you think a red pixel is needed.
Don't be too fussy about this cleaning up. Change only those few pixels that were obvious to you at normal view—and if you find this step just too tedious, you can skip it altogether. top
Zoom to Normal View
Click the 100% button ![]() above the Navigation Window and your view will return to normal.
above the Navigation Window and your view will return to normal.
Make Changes to Copies of Your Picture
It's surprisingly easy to completely change the colour of your picture. First we'll make a copy and resize it a bit.
Make One Copy
Click the Selection button ![]() in the Toolbox
in the Toolbox
Lasso Options
Click the Lasso Selection Tool ![]() in the selection options.
in the selection options.
 Have the bullet in Cut Copy Delete set to Copy.
If the little Empty Lasso Selection button ![]() looks like this, click it once to change it to the Filled Lassoo Selection button
looks like this, click it once to change it to the Filled Lassoo Selection button ![]() This will ensure that the yellow centre of the flower is copied. (It probably would be anyway, since it has been coloured.)
This will ensure that the yellow centre of the flower is copied. (It probably would be anyway, since it has been coloured.)
Draw a marquee outside your whole flower. Release the mouse button, then press on the selected flower and drag the copy up and to the left.
Make it Smaller
With the selection still active, click the Transform Tool ![]() in the Toolbox.
in the Toolbox.
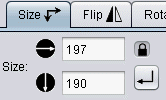 In the Transform options, click the Size tab.
The current dimensions of your picture will be shown in the two boxes. They will not be the same as mine.
Change these dimensions just a little, to get the idea.
I'm changing my top number (width) to 144. The lower number, (height) is changed automatically. The little Lock button ![]() protects the ratio of the two dimensions. It can be turned off to allow separate dimensions to be typed in, but we definitely want to protect the proportions of this picture!
protects the ratio of the two dimensions. It can be turned off to allow separate dimensions to be typed in, but we definitely want to protect the proportions of this picture!
Click the Do it button ![]() .
.
Click the Selected button ![]() to cancel your selection. The Size selection will expand around the whole canvas, giving you the opportunity to change the size of the canvas. Click the Pencil Tool in the Toolbox and the canvas selection will be cancelled. (Any other tool would do. I just find the pencil handy.) top
to cancel your selection. The Size selection will expand around the whole canvas, giving you the opportunity to change the size of the canvas. Click the Pencil Tool in the Toolbox and the canvas selection will be cancelled. (Any other tool would do. I just find the pencil handy.) top
Copy the Smaller Flower
Click the Selection button ![]() in the Toolbox
in the Toolbox
Copy
Click the Lasso Selection Tool ![]() in the selection options.
in the selection options.
Have the bullet in Cut Copy Delete set to Copy.
Draw a selection marquee around the copied flower.
Change the Colour of the Flower
Click the Colours and Effects Filters button ![]() in the Toolbox.
in the Toolbox.
RGB Filter
In the filter options, choose RGB as the Filter. It's at the top of the drop-down list.

There are three strips of colour. In the middle of each, there's a movable bar. Press on the bar on the green strip and draw it to the right until the number at the end is 60.
Release the mouse button and look at your flower.
Click the Selected button ![]() to cancel your selection.
to cancel your selection.
Try Another Colour
Click on the Selection button in the Toolbox. The options should still be Copy and Lasso.
Select your small red flower and drag a copy away from it.
With the selection still active, again click the Colours and Effects Filters button ![]() in the Toolbox.
in the Toolbox.
This time, pull the slider bar on the blue strip along to the right until it reads 80. Release the mouse button.
Darker Colours
Make yet another copy of the small red flower and again bring up the RGB filter.
Move the blue slider bar as far to the right as it will go. You'll see that this doesn't give you a blue flower. There's still red in it.
To remove the red, you'll need to move the red bar all the way to the left. This does give you a blue flower, but the blue is very deep. top
HSL Filter
To make the blue lighter, you'll need to use the HSL filter, which is third from the top in the filter drop-down list.

Luminance There are three strips. Look at the bottom one, which is labelled Luminance. As you drag it to the right, the flower brightens. You'll find that if you drag it all the way to the right the flower disappears entirely. Drag back and forth, releasing the mouse button after each drag to see the effect.
Hue Now try moving the Hue slider. At either end of the scale you'll get a soft yellow, and all sorts of different colours will be produced between those extremes. For now, get a soft blue and cancel your selection.
Export the Original Big Flower
The canvas is getting pretty crowded, so if you want to try more colour changes, that big flower has to go; but you might want to keep it for later. Here's what you do.
Click the Selection button. Leave the options as they are.
 With the Lasso, draw a marquee outside the big flower.
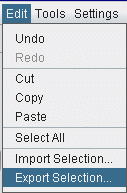
Click Edit on the Menu Bar
Click on Export Selection.
The Save Dialogue will appear. Type a name for the selection. I called mine big_red_flower and accepted png as the format.
Before clicking Save, make sure that there's a tick in the Trim to Area box ![]() to the right of the box showing your files.
to the right of the box showing your files.
Click the Save button. You'll be returned to your working canvas. The big red flower is still selected. You can now safely click the red Delete button under the Cut Copy options. top
Use the Eraser to Clear Your Canvas
After I'd deleted the flower, I saw that there were slight traces of red left behind.
![]() Click the Eraser button in the Toolbox.
Click the Eraser button in the Toolbox.
Without any options set, the eraser always erases to white—if that's the background colour, as I'm presuming. To clear everything completely, the Eraser Strength should be 255.
The Rectangle is a convenient shape, and 20 is a useful size. There should be no feathering.
Just press and drag the eraser over any unwanted traces of red, zooming in a little if you think it necessary.
Now you have room for at least two more flowers, so make copies and experiment. Try some of the other filters to see what they do.
Restore the Yellow Centres
Click the Paint Bucket button in the Toolbox. Make sure that the options say Local Replace and that the Neighbour Rule is Full on.
Click on a colour in the Swatches part of the Colours and Paints Palette. It can be the original yellow or a colour you'd prefer to use for a particular flower.
With the colour chosen, click into the centre of a flower to replace colour changed during the filtering process. Change colours for the next flower if you want to.
Export and Save Your Finished Flowers
Click the Selections button. Choose the Lasso and make sure that the Lasso Shrink Strength is close to the left of the slider.
Draw a marquee right around all of your flowers as one selection. Look to see that every flower has selection marks jiggling around it.
The first time I selected mine, I'd been fiddling with the Shrink Strength,and had it towards the right. The result was that a pale blue and a pale pink flower were not included in the selection. Without cancelling the selection, I dragged the slider along to the left and then all my flowers were selected.
Go to the Edit Menu, choose Export Selection, type a name for your image, check that the Trim to Area button is ticked and click Save.
Once your flowers are saved you can delete them from your practice page, leaving it free for other work. top
Questions or comments? I'd love to hear from you. My email address is here.
Return to top
June 2011