Change a Piece of Stationery
On other pages
A sample to copy, save and assemble.
Here's how you change the styles to change the colour of the writing area, the font, size and colour of the text and the appearance of a border.
On this page
Making a new piece of stationery from an existing piece
Making your very own stationery Making changes The html file with hints
Background and background tile Width of writing area The main picture
If you have a much bigger picture
Centering
"Begin here" text
Removing the hints
This is the stationery that we've assembled so far.
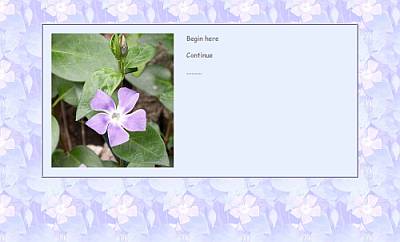
A little further down you'll find another copy of the html file, but you'll see that I've added some hints in capital letters.
The stationery will still work properly with the hints included, so you can copy this if you want to and save it as, say, periwinkle_hints.html. Otherwise, just save it as txt and use it as a reference.
Making a new piece of stationery from an existing piece
The easiest way to go about editing a piece of stationery is to open it in Notepad, go Save As, and type in a new name. Then make your changes on the renamed copy. The original won't be changed. Since you're about to do this exercise, you might just as well call the newly saved file freesia.html.
Making your very own stationery
The whole aim of these three exercises is to make it possible—and easy—for you to make your own stationery with your own pictures and backgrounds. Crop a piece from a picture of your garden. Use that lovely photo of your daughter's wedding. Working through these pages will help you get the hang of it—after that, you should have no trouble at all! top
Making changes
For now, we're just going to look at the part between the body tags.
(I can't put hints into the top part—between the style tags—or the stationery will not work.)
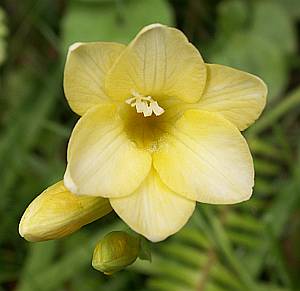 I'm going to suggest that we change the picture for this one.
That'll make the background tile look strange and inappropriate, so we'd better look for a different one. One of these might do.

.
Or one of these. Save the picture and save the tile that you've decided on.
.
Drag both of these images into the folder where you stored the periwinkle stationery.
As well, make sure that you've made a new html file—either by copying the hinted piece below, or by doing a Save As of the original. top
The html file with hints
<html>
<head>
<style type="text/css">
<!--
body {margin-top:3em;
font-family:"comic sans ms", verdana, helvetica, sans-serif;}
.tab1 {padding:20px;
border-width:4px;
border-style:ridge;
border-color:#c5bcf5;
color:gray;
background:#e9f0fd;}
p {margin-top:0em;text-align:left;font-size:14pt;}
.lt {float:left;margin-right:30px;}
-->
</style>
</head>
<!--THIS IS WHERE YOU CHANGE THE COLOUR OF YOUR BACKGROUND
AND THE NAME OF YOUR BACKGROUND TILE-->
<body bgColor="#e8f0fd" background="periwinkletile_blue02.jpg">

<center>
<!--THIS GIVES THE WIDTH OF THE AREA WHERE YOUR EMAIL TEXT WILL BE WRITTEN-->
<table width="750px"
summary="This table is to create a plain background for text">
  <tr>
    <td width="100%" class="tab1">
<!--HERE IS WHERE YOU CHANGE THE NAME OF YOUR PICTURE
AND ITS WIDTH AND HEIGHT-->
<img src="periwinkle0598b.jpg" width="288" height="315"
class="lt" alt="periwinkle flower">
<p>Begin here</p>
<p>Continue</p>
<p>.........</p>
</td></tr></table></center>
</body>
</html>
Background and background tile
<body bgColor="#e8f0fd" background="periwinkletile_blue02.jpg">
The background (colour) is a safety measure. It's there in case the tiles are lost, and should be a colour on which your text will show up. This is important, because some webmail accounts will strip out part of your work. This colour will work for any dark text, but if you'd like to change it to a pale yellow, change #e8f0fd to #ffffcc.
Stationery will
Then change the name of the background to that of the tile you've saved.
Take care with both of these changes; make sure that you don't remove the quotation marks.
Width of writing area
The next lot of capitals that you see refer to the part of the stationery on which you'll write your email. It's best to keep this reasonably narrow. On a very small screen a wide email can't be read without scrolling across, while on a wide screen, an email that's opened full screen and that has text from margin to margin is pretty hard to read. The lines of text are just t o o l o n g ! Anything between 750px and 900px should be reasonable. Notice that there is no space between the number and px.
<table width="750px"
summary="This table is to create a plain background for text">
Or
You can make the writing area become narrower or wider according to the size of the window by giving it a percentage.
<table width="80%"
summary="This table is to create a plain background for text">
The summary part is just my attempt at good manners. You'd expect a table to contain—well, a table. top
The main picture
<img src="periwinkle0598b.jpg" width="288" height="315"
class="lt" alt="periwinkle flower">
When you change the main picture, there are three changes to be made: the name of the picture, its width and its height.
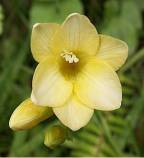
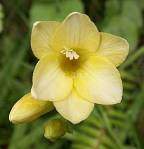
It's probably easiest if you open the picture in Irfanview, so that these details are easy to find, or otherwise you can hover your mouse over the filename of the picture and you'll see its dimensions in a tooltip. The name of the picture is shown in the Irfan's title bar and the dimensions are given on the status bar. Copy the name exactly. The freesia picture above is called freesia0611c.jpg
Now, if you leave the height and width as they are, your picture will be distorted, as it will if you accidentally put the height where the width should be and vice versa. This may not seem to be the end of the world, but if the picture is of a person the results can be unfortunate.


.
Change the dimensions carefully. The dimensions of the freesia picture are width 300 and height 291. Change the alt text, too. That is there to give information about the picture, and will show as a tooltip on hovering. top
The full description of the image should now read
<img src="freesia0611c.jpg" width="300" height="291"
class="lt" alt="freesia bloom">
If you have a much bigger picture
Centering
If you're using a picture of your own and it's more than half the width of the text box, you may prefer to have your writing appear only below the picture, rather than squeezed up in a narrow column on the right side of it.
<img src="periwinkle0598b.jpg" width="288" height="315"
class="lt" alt="periwinkle flower">
To change that, simply cut out the bit that says class="lt" and add centring tags, as shown here.
<center>
<img src="cricket_match.jpg" width="554" height="430"
 alt="John playing for his school">
</center>
"Begin here" text
<p>Begin here</p>
<p>Continue</p>
<p>.........</p>
More than one line here isn't stricty necessary, but it can make it easier to remember where to put your cursor to begin typing. It's particularly helpful if you pass the stationery on to a friend. When starting an email, you highlight the existing text and write over it.
Removing the hints
If you've edited the version with hints in capital letters and you want to remove them from your file once you've made your changes, be sure that for each hint you remove everything between and including the <!--and the-->

Change styles
To change the colour of the writing area, the font, size and colour of the text and the appearance of a border—or to remove the border altogether— you'll need to change the styles at the top of the html file. Here's how you change the styles.
Saving the original stationery
This page gives you a sample to save and assemble.
Questions or comments? I’d love to hear from you. My email address is here.
Return to top
Drop-Down Menu from Brothercake
Everything below this is a javascript menu. If you are using a reader,
please use the links here.