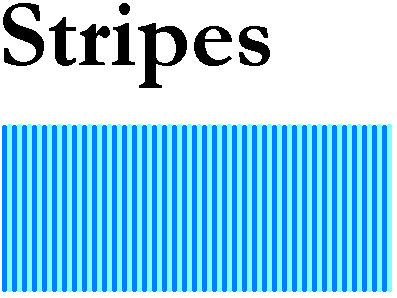
Oblique Stripes

Return to list of Examples Return to Making Fancy Text
Click on the Text tool and draw a text box. Choose a font and size. Click B for bold if you like. For the heading above I used Garamond 120 bold, and for the directions below I used Garamond 72 bold.
Type your heading in black.
Zoom in to 8x and position your window further down the page so that you'll be working a little below the typing.
 Click the Line tool and choose the thickest line—the bottom one.
Click on a colour and draw one vertical line, then click on a different colour and draw another line right against the first one.
 Click the Rectangular Selection tool and highlight the Transparency icon—the lower one.
For Windows 7, find the Transparent Selection option at the bottom of the Select menu.
Draw a marquee around the two stripes, press the Ctrl key as you begin to drag, and position a copy of the two stripes right up against the original.
Click away, then draw a new marquee around all four stripes and copy those across.
Continue in this way until your window gets crowded.
Zoom out, then zoom in to 2x.
Again click the Rectangular Selection tool.
Draw a marquee around the stripes, tap the Ctrl key and drag a copy down. Then copy the whole thing and drag the copy across again.
Continue copying until the block of stripes is noticeably higher and longer than your typed heading.
You'll have to click on the Selection tool each time you change your zoom level. top

Copy the Stripes
Sometimes, if you hit Undo on a copied selection, the selection will disappear and so will the original, so draw a selection around the stripes, Ctrl drag them down the page a bit, click away and then select the copy again before you continue.
Skew
Skew the Stripes
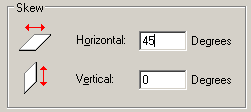
Draw a marquee around the copy, click the Image menu and click on Stretch and Skew.

In the Stretch and Skew dialogue, type 45 into the Horizontal part of the Skew section, then click OK.
If that worked well, you can now select and delete the extra block of stripes.
Make a Copy of the Heading
Draw a marquee around the heading you typed earlier and drag a copy to a free space. You'll need it later.
Invert the Colours
Draw a marquee around the heading and for Windows earlier than 7 go to the Image menu and click Invert Colours.
In Paint for Windows 7, right click on the selection and choose Invert color from the bottom of the menu that appears.

First making sure that your background colour is white and that your selections are transparent, drag the now white on black heading onto the skewed background. top

.
Flood the Mask with White

Click the Flood Fill tool and right click on the black rectangle and into any enclosed parts of letters.
.
Pick up the Heading
 Now draw a marquee around your heading, inside the white rectangle, but not quite touching the letters.
Copy it to a free space. top
Give it a Shadow
Find the copied heading that you set aside earlier.
Use the Flood Fill tool to change its colour to something you feel would look well as a shadow. Beware of using a similar colour to those in the striped heading. It seems to cause funny effects.
Pick up your striped heading and put it almost on top of the plain one.

Save Your Work
Select the finished heading and in 98, XP and Vista open the Edit menu and choose Copy to. In Paint for Windows 7 choose Crop from the Select menu.
Return to list of Examples Return to Making Fancy Text
Questions or comments? I'd love to hear from you. My email address is here.