Make a Page Border in Paint
If you're making a cover page, a border can give it a finished appearance, but should be appropriate for the material being presented. A decorative border would probably not be ideal on your C.V!
For a more formal page, perhaps two or three thin lines would make a suitable border.


To have your cover page and border print out nicely and as you intend, you need to set the image size to the size of the paper on which you'll be printing. This is particularly important if you have small text on the page. If it's stretched, it can look pretty woeful.
Setting up the Page
If you're using A4, set your image size to 21.01 x 29.69cm. If you're using American letter, set it to 8.5 x 11 inches. You'll find detailed instructions for setting up the page in Printing a Full Page from Paint.
Save Your Blank Image, then Draw Guidlines.
Mark a Measurement
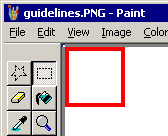
Using red, click the Rectangle tool.
Hold down the Shift key while you drag to draw a small hollow square—say 20 x 20.
Click the Rectangular Selection tool, draw a marquee around the square and click Edit > Copy.
Zoom in and scroll to a corner of your image.
Click Edit > Paste.


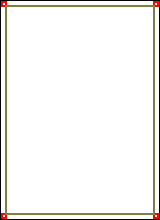
 Drag the red square right into that corner, as far as it will go with all four sides remaining visible but with no white showing between the red square and the corner of the image.
Scroll to another corner, Click Edit > Paste and position the next corner marker.
Repeat for each of the remaining two corners.
Draw the Lines
So that you can easily erase it later, choose a colour you don't plan to use in your real design.

 Click on the Line tool. Use the thinnest line.
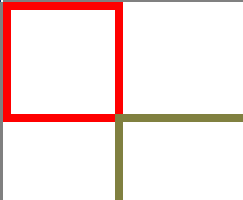
Hold the Shift key while you draw lines connecting the inside corners of the red squares.
It doesn't matter if these lines go from edge to edge of the page. You'll be colouring the squares to match them and they'll be erased later.
When the guidelines are all done, use the Flood Fill tool to make the red squares the same colour as your guidelines. (They were red for visibility.)
Vary Guidelines as Needed
If you need further guidelines, follow the same idea. You could put a square in each corner of the first set of lines and draw a second set.
An Example of a Making a Decorative Border
You could take a small graphic and paste it repeatedly until you've made a whole new border, as I did with the flower in the illustration at the top of the page.
Making the Flower Border
![]() To make the border, first make five copies of the same flower, then use the Flood Fill tool to give each one a different colour. With transparent copy selected, paste a copy of each flower onto the left guideline, one below the other. Select this vertical line of five flowers and, holding Ctrl, drag a copy to a position exactly underneath, making sure that the line stays quite straight. Repeat this until the line is long enough, then Ctrl drag one copy to the right guideline.
To make the border, first make five copies of the same flower, then use the Flood Fill tool to give each one a different colour. With transparent copy selected, paste a copy of each flower onto the left guideline, one below the other. Select this vertical line of five flowers and, holding Ctrl, drag a copy to a position exactly underneath, making sure that the line stays quite straight. Repeat this until the line is long enough, then Ctrl drag one copy to the right guideline.
Drag another copy of the whole line into the middle of the page, without putting it on top of your original five flowers. Since this line will be too long for a top or bottom border, select about a third of it—or seven flowers—and press the Delete key. After selecting the remaining shorter vertical line, use Image > Flip/Rotate > Rotate by Angle > 90° to get a horizontal line of flowers. Take a copy of that line up to the top guideline. If necessary, from your original collection, Ctrl drag one flower at a time to complete the line, then select the whole top line and drag a copy onto the bottom guideline.
When all sides of the flower border are in place, gather the original five flowers into a little bunch and paste it at each corner.
Use the Colour Eraser or the Flood Fill tool to clean away any remaining bits of the guidelines.
Questions or comments? I’d love to hear from you. My email address is here.