Printing a Full Page from Paint
Sometimes you may want to make a whole page in Paint. For instance, Mary, a reader, wanted to make a cover page for a report.
You could, of course, make the parts of the page and assemble them in a word processor or a desktop publishing program, but sometimes it's more convenient to do the whole thing in Paint.
Printing a Full Page from Paint in Earlier Versions of Windows
Printing a Full Page from Paint in Windows 7
This worked for me.
Click the down arrow on the Paint button ![]() at the left end of the Menu Bar.
at the left end of the Menu Bar.
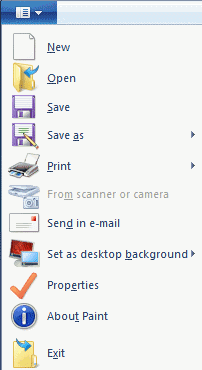 On the menu that appears, click on Properties.
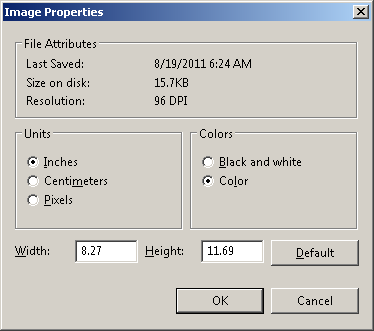
.
I typed in the full measurements of an A4 page: 21.01 x 29.69cm or 8.27 x 11.69 inches or 720 x 1018 pixels.
For American Letter that would be 21.59 x 27.94 cm or 8.5 x 11.00 inches or 740 x 958 pixels.
Click OK.
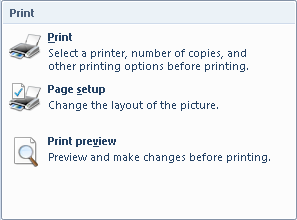 Once again I clicked the down arrow beside the Paint button
 ![]() .
.
When I hovered over Print, this menu appeared.
.
I chose Page setup. Here's the Page setup dialogue.
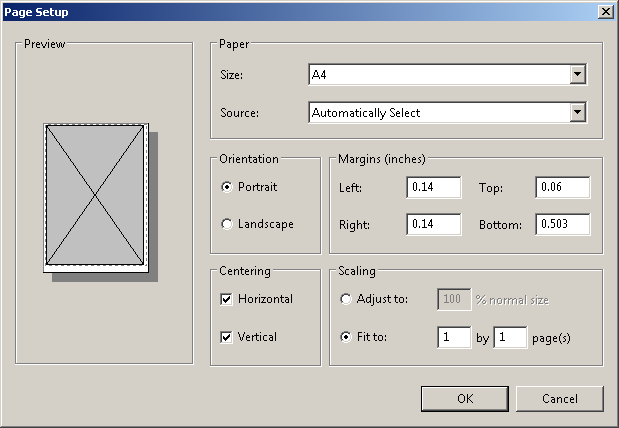
First of all, I changed the Orientation to Portrait.
Under Centering, I ticked both Horizontal and Vertical.
Under Margins, I swiped the numbers from each box and typed in a 0. Windows politely adjusted these figures, but slightly.
Then I went to the bottom and marked Fit to and replaced the 2 that was in each box with a 1.
I clicked OK.
Then I went back to the Page setup dialogue to see if any changes had been made. They had, and I saw that the left margin was to be wider than the right margin. I didn't want that, so I copied the left margin number into the right margin box.
For my test page, I made a border—just a thin black rectangle—very close to the edges of the page all the way around.
I saved the page, clicked the down arrow beside the Paint button ![]() and clicked Print.
and clicked Print.
The page printed just as I'd hoped.
Printing a Full Page from Paint in Earlier Versions of Windows
An important thing to remember about Paint in earlier versions of Windows is that your Page setup settings will not be kept from session to session. This is a real pain, because the default print-out for a page this size is to print one quarter on each of four pages!
If you close and then re-open a Paint page you've set up for printing, you must adjust the settings all over again.
Image Size
OK. Before you begin to make a cover page, set up your image size.
Click the Image menu and click Attributes.
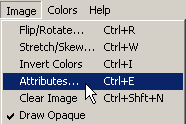
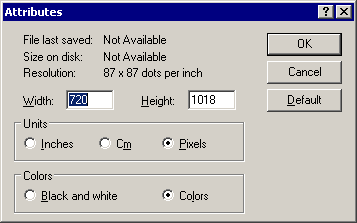
In the dialogue box type the size of your paper.
For an A4 page that's 21.01 x 29.69cm or 8.27 x 11.69 inches or 720 x 1018 pixels.
For American Letter it's 21.59 x 27.94 cm or 8.5 x 11.00 inches or 740 x 958 pixels.
These settings will be kept for future new documents until you change them.
Page Setup
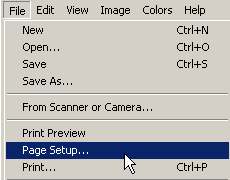
Click the File Menu and click Page setup.
In the dialogue box appears, make these settings.
Orientation: Portrait
Under Centering, tick both Horizontal and Vertical.
Clear each margin box and replace the figures with a 0.
Mark Fit to and put a 1 in each space.
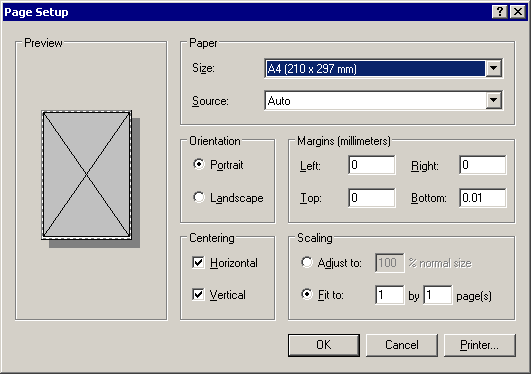
Now, if you click OK and print straight away—without closing Paint—the page will print as you intend it to. You can even continue working on the image and save it several times.
But
If you close Paint, when you open the same image later—whether it's next week or next minute—those settings will have reverted to this. (I'm just showing the relevant parts of the dialogue.)
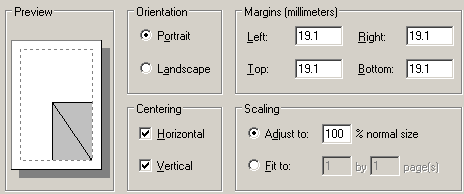
As the Preview indicates—and Print Preview, if you care to look at it—a quarter of your image would be printed on each of four pages. Not funny, especially if you have big areas of colour!
So
Before you print, always, always, always check the Page setup.
If you feel that this is all too much to fiddle with, there's a nice simple alternative.
Print Paint Pictures with Irfanview
For me, now, the most reliable way to print any sort of graphic is through IrfanView. Because this page is all about printing a full sized cover page, that's what I'm outlining here, but you can use Irfanview to print any graphic at all: an icon, a small logo, a house plan or a happy picture made by a small child.
After preparing and saving your page, open it in Irfanview.
On Irfan's File Menu, click Print.
Choices in the dialogue are pretty comprehensive. You can print the picture at its actual size, or to fit the printed page, as I've chosen here. If you choose Stretch to Page, the proportions of the picture will be somewhat distorted. With some pictures this may not matter, but you'll usually want the aspect ratio preserved.
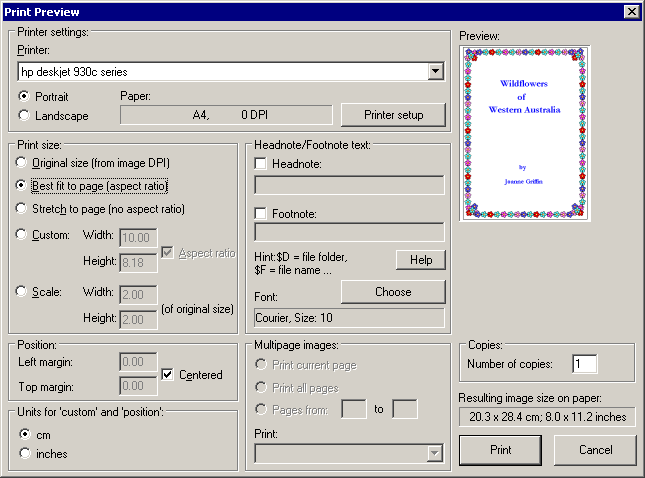
To fill the page nicely, with balanced margins, tick Centered.
For a cover page, like this one, you won't want a headnote or footnote, so for your cover page leave those places without a tick.
There will be some pictures where you will want some sort of label—a family photograph, for instance, on which you'd like to make a note of the event and the date the picture was taken. When that's so, tick the Headnote or Footnote square—or both— and space will become available for typing into.
When you've carefully marked your options, click the Print button.
Questions or comments? I'd love to hear from you. My email address is here.