Birthday Balloon Stationery Examples
Make a folder for your new stationery
Put the folder where Outlook Express or Windows Mail can find it
How to copy the template Further editing
Use your work to make completely new stationery
Removing hints First template Second template
Using your balloon tiles in stationery

You've made some balloon background tiles. Here there are two templates to help you to use those tiles immediately.
To see how the Birthday Balloon stationery might look at full size, (minus the "back button" message, of course) right click and open one of these examples in a new tab (or a new page).
.
Bright ballon birthday stationery Soft balloon birthday stationery
Although the examples shown here use particular tiles, there's no reason why you should use the very same tiles if you don't want to. You could make up the first example with soft tiles, or you could use bright tiles for both. Just make sure that what's written after "background=" is the name of the background tile that you have saved and want to use.
If your own tile is called balloons_red.gif, for instance, you'd change this:
<body bgColor="#ffffcc" background="balloons02.gif"> to
<body bgColor="#ffffcc" background="balloons_red.gif">
You will need
Easy access to Notepad
Notepad is the text editor that comes with Windows. If you have a different—and better— text editor, such as Notetab, by all means use that instead, but do not use any word processor, such as Word.
Before you start, make a shortcut to Notepad—or your preferred text editor—on your Quick Launch bar or at the top of your Start menu. In XP, the path to notepad is C:\WINDOWS\notepad.exe. In Vista, begin typing notepad and Vista will immediately find it for you.
Easy access to your stationery folder
You will also need a shortcut to your stationery folder. Put that somewhere you find convenient, such as on your desktop.
Putting your stationery together
Make a folder for your new stationery
Make a new folder on your desktop or in the same place as you put the shortcut to your stationery folder.
Call the folder balloons
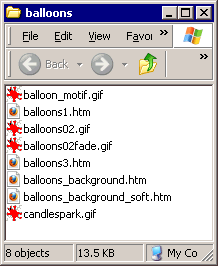
Into the balloons folder, put the tiles that you've made.
Copy the template
Then, copy one or both of these templates and put it/them into the balloons folder. So long as each has a different name, you can put any number of html files/s into that folder.
Edit the file to suit your own wishes.
Put the folder where Outlook Express or Windows Mail can find it
Drag the balloons folder into your main stationery folder.
How to copy the template
Click your cursor into the beginning of the white area and select the first pointy bracket.
Hold the Shift key and scroll down.
Click at the end of the white area, after the last pointy bracket. Everything in the white area should now be highlighted.
Right click and choose Copy.
Open Notepad.
On the menu bar of Notepad, click Edit > Paste.
Click File > Save As.
Click the dropdown beside Save as type and choose All Files.
Type in the suggested name—or a name that you'd prefer—and click Save.
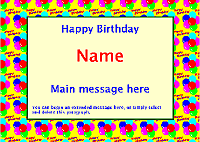
The first template will make up a piece of stationery that looks like this (minus the "back button" message, of course).
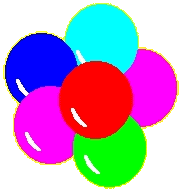
 The second piece of stationery, which uses a tile with softened colours, looks like this. It also uses this transparent gif image, which you can copy and save as balloon_motif.gif if you want to use it.
Both templates include hints to help you while you're editing. The stationery works fine with the hints included—they don't show in your email!
Colours, sizes and font of text can be changed while you're writing your email. If you want to change those permanently, or alter the look of the border, please read through the page about stationery styles, where all is revealed!![]()
 Further editing
When you'd like to make a different piece of stationery using the original template, just open the original in Notepad and go Edit > Save As. Type in a new name. Do your editing. Your original will not be affected.
Completely new stationery
Eventually you'll be heartily sick of balloons. Make a new folder in your stationery folder. Name it according to what you plan to do: flowers, cats, children, whatever. Put new tiles and images into the folder.
Drag or copy/paste a copy of one of your succesful pieces into the new folder. Rename the file appropriately—daffodils, wattle or violets, perhaps. Then edit the copied and renamed file.
Removing hints
After a while you will no longer need the hints and might like to remove them. Just select the whole hint, including the <!-- and the --> and delete it, like this.

First template
Bright background, solid yellow border
Save as bright_balloons.htm
.
<html>
<head>

<style type="text/css">
<!--
body {margin-top:3em;
font-family:"comic sans ms", verdana, sans-serif;
font-size:20pt;
font-weight:bold;}

.tab1 {padding:20px;
border-width:6px;
border-style:solid;
border-color:#ffff00;
color:#0000ff;
background:#ffffcc;}

p {margin-top:0em;text-align:center;
font-family: "lucida sans unicode",
"arial black", sans-serif;
font-weight:bold;font-size:36pt;}
.lt {float:left;margin-right:30px;}
.name {color:red; background:#ffffcc; font-size:60pt;}
.longer {font-size:14pt; text-align:left;}
-->

</style>
</head>
<!--THIS IS WHERE YOU CHANGE THE NAME OF YOUR BACKGROUND TILE.
THE NAME MUST BE EXACTLY THE NAME OF THE TILE YOU WANT TO USE-->
<body bgColor="#ffffcc" background="balloons02.gif">

<center>
<!--THIS GIVES THE WIDTH OF THE AREA WHERE YOUR EMAIL TEXT WILL BE WRITTEN-->
<table width="750px"
summary="This table is to create a plain background for text">
  <tr>
    <td width="100%" class="tab1">

<p>
<!--THESE WORDS CAN BE CHANGED WHILE YOU
ARE ACTUALLY WRITING THE EMAIL TO SOMEONE-->
Happy Birthday
</p>
<p class="name">
<!--YOU'D SELECT THIS AND WRITE OVER IT WHILE YOU'RE
WRITING THE EMAIL-->
Name</p>
<!--SELECT AND WRITE OVER THIS WHILE YOU ARE WRITING YOUR EMAIL-->
<p>Main message here</p>
<!--THIS IS SMALLER TEXT SO THAT YOU CAN
WRITE A LONGER MESSAGE IF YOU WISH TO-->
<p class="longer">You can begin an extended message here,
or simply select and delete this paragraph.</p>
</td></tr></table></center>

</body>
</html>
Second template
Soft tiles with red dotted border
Save as soft_balloons.htm
<html>
<head>
<title>Stationery Example</title>

<style type="text/css">
<!--
body {margin-top:3em;
font-family:"comic sans ms", verdana, helvetica, sans-serif;
font-size:20pt;
font-weight:bold;}

.tab1 {padding:20px;
border-width:6px;
border-style:dotted;
border-color:red;
color:blue;
background:#ffffdd;}

p {margin-top:0em;text-align:center;
font-family: "lucida handwriting","brush script","comic sans ms", sans-serif;
font-weight:bold;font-size:36pt;}
.lt {float:left;margin-right:30px;}
.rt {float:right;margin-left:30px;}
.name {color:aqua; background:#ffffdd; font-size:60pt;}
.longer {font-size:14pt; text-align:left; color:navy; background:#ffffdd;}
-->

</style>
</head>
<!--THIS IS WHERE YOU CHANGE THE NAME OF YOUR BACKGROUND TILE
IT MUST BE EXACTLY THE SAME AS THE NAME OF THE TILE YOU WANT TO USE.-->
<body bgColor="#ffffcc" background="balloons02fade.gif">
<center>
<!--THIS GIVES THE WIDTH OF THE AREA WHERE
YOUR EMAIL TEXT WILL BE WRITTEN. YOU CAN CHANGE IT.-->
<table width="750px"
summary="This table is to create a plain background for text">
  <tr>
    <td width="100%" class="tab1">

<p>
<!--THIS IS A PICTURE.
THE FILE NAME, SIZE AND WIDTH NEED TO BE EXACTLY CORRECT-->
<img src="balloon_motif.gif" width="180" height="194"
class="lt" title="bunch of balloons" alt="bunch of balloons">
<!--yOU CAN CHANGE THESE WORDS IN THE STATIONERY
OR WHILE WRITING YOUR EMAIL-->
Happy Birthday</p>
<!--YOU CAN SELECT AND CHANGE THE PERSON'S NAME
WHEN YOU ARE WRITING YOUR EMAIL-->
<p class="name">Name</p>
<!--YOU MIGHT WANT TO CHANGE THIS TO "CONGRATULATIONS" OR SOMETHING-->
<p>Main message here
<!--THE PICTURE AGAIN-->
<img src="balloon_motif.gif" width="180" height="194"
class="rt" title="bunch of balloons" alt="bunch of balloons"></p>
<!--THIS IS FOR ANYTHING EXTRA YOU WANT TO SAY IN THE EMAIL.
YOU CAN CHANGE SIZE, FONT AND COLOUR WHILE YOU ARE WRITING THE EMAIL-->
<p class="longer">You can begin an extended message here,
or simply select and delete this paragraph.</p>
</td></tr></table></center>

</body>
</html>
Questions or comments? I’d love to hear from you. My email address is here.
Return to top
Drop-Down Menu from Brothercake
Everything below this is a javascript menu. If you are using a reader,
please use the links here.