A Background with Your Name
This presumes that you have the basic principles, as described in Making Seamless Tiles, down pat. The directions here don’t have anything like as much detail.
 For decoration I've used the Wingdings font, believing it to be on most people's computers. For easy reference, the symbols I used were these. In the end, the flower—under the curly bracket—seems to have taken over the design, so you could, if you wanted, just use that in various sizes and forget the other four entirely.
The choice of colours here isn’t arbitrary; in an embossed tile, soft colours visually move their objects back. Please use my colours first time around, so that you can see their effect on the finished background.
Begin as usual with a 400x400 or larger window in Paint. Draw a filled aqua square 200x200. Click yellow for your foreground colour. Click on the text tool and draw a big text box in a free part of the window. Set the font to Wingdings and the size to 72. Type the symbols I've suggested, or choose some that you prefer.
Click out of the text box, then click the text symbol again, draw a new text box, change the font size to 48 and type the symbols again. Do the same thing with font size 36.
 Click the rectangular selection tool. With white as your right mouse button colour and the transparent icon selected under the tool box, select the typed symbols and Ctrl Drag them onto the aqua tile. Place them at random, only taking care not to touch the outside edges of the tile.
Use the Flood Fill tool to fill some of the flower symbols with silver—not the darker grey.
.
Click the Rectangular Selection tool and Ctrl Drag a copy of your typed symbols to a free space.
Change your background colour to pink and use the Colour Change Eraser (right-button) to drag over the copied symbols and change them to pink. Change your background colour back to white. Drag copies of the pink symbols onto your tile. Fill some of the flower shapes with silver or yellow.


When you have the tile covered with lots of overlapping shapes, cut it down the middle and move the left half to the right side. Cut it across the middle and move the top half below the bottom half.
If this puzzles you, here's an explanation.
 Ctrl Drag more symbols onto the tile to fill spaces. Put some yellow flowers on top and fill them with pink.
![]() Click on black for your foreground colour. Click the Text tool and drag a text box about 100 pixels wide. Choose a font and type your name. Choose a font size that allows your name to fit into the text box. That is, use a small font size for a long name, a larger size for a short name. I used Maiandra 36 point.
Click on black for your foreground colour. Click the Text tool and drag a text box about 100 pixels wide. Choose a font and type your name. Choose a font size that allows your name to fit into the text box. That is, use a small font size for a long name, a larger size for a short name. I used Maiandra 36 point.
Click the Rectangular Selection tool and draw a selection marquee around your name.
Click Image > Stretch and Skew. In the Skew box, type 20 into both the horizontal and vertical places. Drag the resultant skewed image onto the tile. Fill any empty spaces with more symbols, outlined in yellow and filled with pink.
 Click the Rectangular Selection tool, outline the tile carefully and click Edit > Copy.
Open sTile. Click Edit > Paste > Replace Image.
Click the Show Tiles icon. If you have white lines go back to Paint and copy the tile again. Otherwise, close Paint.
In sTile, save the tile as name01.gif. With this master tile saved, you can try different colours and effects.

 The first step here is to first click Effects and choose Classic Emboss. Then click Color and choose Gray Scale.
Save the second of these as name_grey.jpg. The first one—the one with rainbow colours—won't be lots of further use, so save it only if you want to. The original tile will always be available so that you can start again, taking a different direction.
The reason for using the jpg format is that this tile, while it may look all grey, really has many different shades blending into each other and the gif format just won't do the job.
.
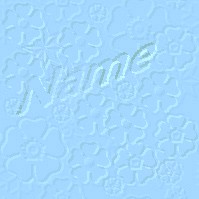
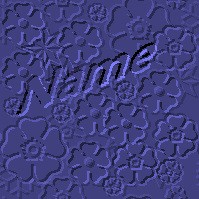 With the grey tile still in the sTile window, click Color and double click Tint. This palette will open. Click a colour and click OK. I chose mauve. This is the result. At this stage the tile keeps its original colour depth. Save the tile anyway; you may want to return to it. Use a name that reminds you what it looks like.
.
Now, still in the Color menu, click either Brighten or Lighten. For this work, each will give similar effects.
If it wasn't already visible, the colour adjustment box will open. If the sliders aren't visible, click the crayon button and the sliders will drop down.
 Each slider is positioned at the middle of its bar. Pull just the Lightness slider half-way to the right, as shown here.
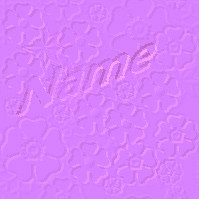
Click the big green tick at the bottom of the slider box. The tile will change to a rather uninspiring mauve. Go to the File menu and Save the tile with a suitable name.
Now play with the different sliders. Pulling the Red slider just half its own width towards the left will give you a soft blue. Moving Green the width of the slider to the left makes the tile a strong lilac, whereas moving Red and Blue a small distance to the left results in a green tile.
Experiment with small adjustments of different sliders; move Contrast and or Saturation to left or right, add or subtract Red, Green or Blue, increase or decrease Lightness. Don't feel that it's necessary to have either the flower pattern or your name stand out distinctly on the tile in the window; when you view a background of many tiles you'll see that both are quite obvious enough.
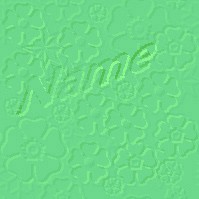
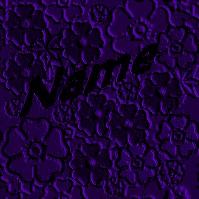
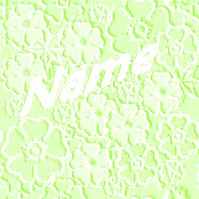
For a completely different set of effects, re-open your original name01.gif—the tile that still has all the colours you used in Paint. This time, click on Color and double click Gray Scale. The result won't have the bas relief effect of the embossed tile, but a strong textured effect is achieved by clicking HeightMap on the Distortions menu. After doing this, choose a colour by clicking Tint on the Color menu. This gives a rich, dark, strongly textured background. You can lighten or brighten this tile with the sliders as you did before, or you can try double clicking Negative on the Color menu. The light green tile here is the negative of the purple one to its left.

Do investigate the Distortions menu. Some surprising effects are possible.
Questions or comments? I’d love to hear from you. My email address is here.