Sending Photos in Email
Checklist Cropping Look at the Dimensions of the Picture Photograph Formats Resizing Making the Picture Smaller Saving Smaller How to Set Irfan to Open Automatically
The quick and easy way to make photos smaller
Always use a new name when saving a picture you've cropped or are saving at a lower quality, so that your original will be preserved unaltered.
There are all sorts of photographs: some of scenery, some of people. Some are destined to be printed in coffee table books or hung in exhibitions, but most are simply for showing to friends. Photographs that are to be printed need to be of high quality and high resolution, but that's wasted on a computer screen. It just can't do justice to such pictures, so sending them by email or putting them onto a web site can be a waste of download time.
Sometimes, too, it can mean that a picture is not seen at all. People with time-limited dial-up connections aren't always happy to be sent a picture that takes a minute or more to get into their mailbox. One lady that I know simply deletes all emails over a certain size before she downloads the rest of her mail. How can she do that?
Some "Make Do" html editors encourage authors to put a large picture into a page and then assign it a smaller size in a wysiwyg layout. That's how to get the worst of both worlds. The resulting picture will look small, but it'll take just as long to download—and use just as much bandwidth—as if it were being shown at full size. What disgusting trickery on the part of a program trying to pretend that it's more than it is!
Now, please understand that I'm not talking about pictures for printing—this is just about snapshots to be sent and viewed electronically. Also, I'm not giving you the best way to deal with photographs. I'm just telling you what I find fast and easy.
Neither am I suggesting that you replace your original picture with a fast but poorer quality copy. The copy is what you need for emailing efficiently, but if and when you want to make a beautiful print, make sure you've kept the original. top
Checklist
Work in this order:
Always save under a new name, leaving your original unaltered.
I'm assuming that you have a copy of IrfanView. If you don't, you can go to the IrfanView site, read about it and then use one of the download links on that page.
Look at the Dimensions of the Picture
Open the picture in Irfan View. If you want it to open there automatically when you double click, the directions are here. Otherwise, either drag the file and drop it onto Irfan's shortcut icon, or, more sedately, open IrfanView, click File > Open and navigate to your picture.
You probably have Irfan set up to display over-large pictures in a smaller window. If so, to see how big the picture really is, look at the status bar below the picture. (If you wish, you can see a labelled copy of this picture.)
![]()
The very first number that you see tells you the width of the picture. In this example, the picture is 1064 pixels wide. Remember that computer screens can be as small as 640 pixels wide, and that very many are 800 pixels wide. (Just because you have a ride-on lawn mower, don't ignore the fact that the man next door may be cutting his grass with hand shears.) Also, many people prefer to open emails—and web browsers too—in a window, rather than full screen, so, whichever way you look at it, this picture is too wide.
The second number gives you the height of the picture. Computer screens start at about 480 pixels in height, and many are 600—and that's before you consider tool bars and such that use part of the screen height. So 1024 is too tall by a long way.
The next number (here shown as 1/36) tells you how many pictures are in the directory and the position of this picture in that directory. We're not concerned with that right now. The 62% tells how much Irfan had to squeeze the picture to fit it onto your screen. Move along to the next number—the size of the file on disk. It's shown here as 219.96KB. Whew! Biggish!
I'd select 40kb as a top size, unless the picture happened to be very special. Very close friends or family members may be happy to wait a bit longer for your pictures to download, of course. We'll worry about file size in a little, after we've made the on-screen size more reasonable.
Making the Picture Smaller on the Screen
Cropping
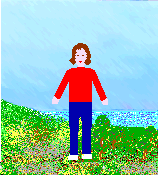
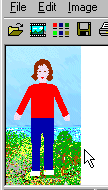
First you need to look at the picture and decide whether you really want to send all of it. Here's a little example picture—and no, it's not a real photograph; it's a little gif image made to illustrate this story. Gif images have less colours than jpgs, so it's a bit easier to see what's going on. You wouldn't usually save a photo as a gif, though. Photos need millions of colours for proper shading.
Consider what's important to the viewer. When you look through someone's new snapshots, are you interested in the background or in the people in the pictures? Quite often, the background, although it may be pretty, is of no particular interest. So, if that's the case, crop it away. If, however, the background is important, skip this step. Only you can decide what you want your final picture to show.

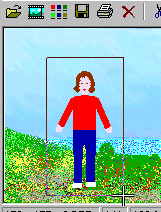
Imagine a frame being put around the important part of the picture, and press down with your left mouse button on the top left corner of that imaginary frame. A cross will replace the usual arrow cursor.
Drag down and to the right until your cursor is at the bottom right of the imaginary frame. A rectangle will be drawn around the part you want to use as your emailable image.
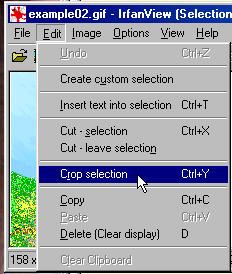
Let go of the mouse button and go up to the menu bar. Click on Edit, then slide down and click on Crop Selection.The selection will appear as a new image, replacing (in the viewer) the one you from which you selected it.
All that remains for you to do now is to go up to the File menu and click on Save as, then type in a new name for your selection. If you accidentally click Save instead of Save as, Irfan will ask whether you want to replace the original picture. It's usually best to keep your options open by saying No. You should always go back to your original picture to make a new selection, otherwise quality can deteriorate until the picture looks awful. top
Resizing
If your picture is wider or taller than screen size, it's fairly obvious that you should resize it before you either email it or put it up on a web site.
Irfan makes resizing easy, but it's a good idea to have a final size in mind before you start, particularly if you have a set of pictures.
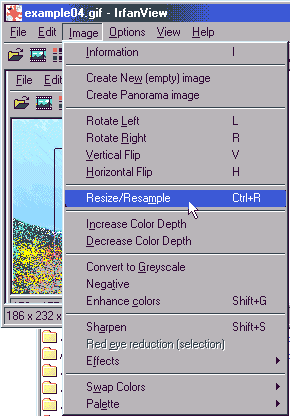
Finding the Resize Box
To get to the box where you resize an image, click on Image on the menu bar, then slide your cursor down the menu that appears and click on Resize/Resample.
.
Resize Options
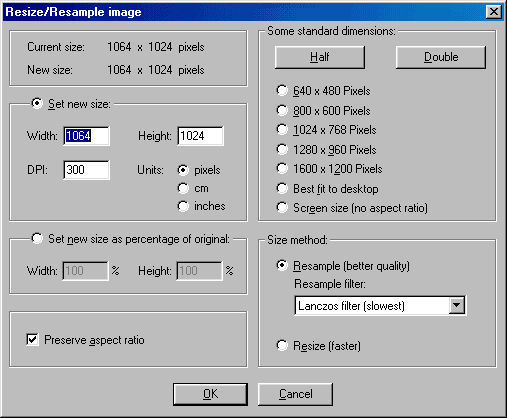
In this whole box, the most important option is Preserve Aspect Ratio (unless you're actually looking for comic effects). ![]()
You choose one method of resizing and ignore the others.
With Preserve Aspect Ratio checked, you can fill in either width or height and the other dimension will be calculated for you.
You could, for instance, decide that you'd like all of your pictures to be 500 pixels in width. Each time you go to resize, type 500 into the width box and the height will be adjusted proportionately.
Similarly, if you choose one of the widths listed in the "Standard Dimensions" area, the height of the new picture won't be that given in the list, but the correct width to keep the picture in proportion, provided that the Preserve Aspect Ratio box is checked. (However, if you're going to email the picture to someone on dial-up, even the smallest size in that list is really too big.)
The "Half" button works perfectly well, but if your original pictures are of disparate sizes, so will your new ones be. Whether this matters or not depends on what you want.
There's a "Double" button too. Well, yeah, right. You know how it is when six extra people turn up at dinner time and you try to double the stew with flour and water? You wouldn't do that? OK. You wouldn't try to make a big pic out of a little one either. Too watery by half! top
Saving Smaller
On the File menu of Irfanview there's now an item Save for Web. Click this and you'll be into a dialogue where you can see what the picture looks like at different qualities and save the one that's best—with a new name, of course. Fantastic!
This is only available if you downloaded and installed the Plug-ins for Irfanview.
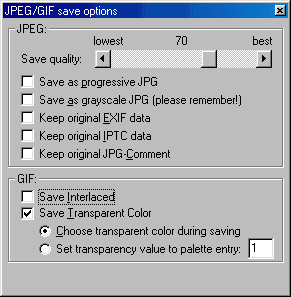
You'll want to save your selection—or the whole picture if that's your choice—in jpg format.
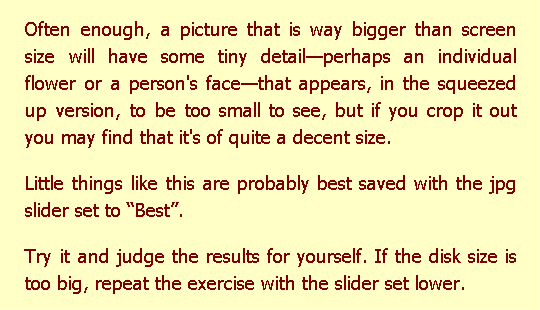
While you're saving, this box will appear. You can see that it offers "Best" and "Lowest" quality, plus everything in between. If you choose "Best" your picture will still have a lot of disk size—probably more than you'd like. Most of the time, saving a picture with the slider set at 70 will greatly reduce file size while keeping the appearance of the picture more than acceptable.
You really have to experiment. Pictures with many fine details sometimes just have to be bigger or the detail is lost. Masses of tiny flowers can look fairly ordinary if the quality of the jpg is set too low.
NB The jpg options share a box with gif options. When you're saving jpgs, nothing in the gif options is going to affect your save. They probably share this space because they're the two formats you'll need most often and Irfan doesn't want to make you go hunting more than necessary. Rest easy. You won't get transparent areas in your jpgs—the format doesn't allow it. top
How to Set Irfan to Open Automatically When You Double Click a File
This isn't something you must do. I find it convenient, but you may prefer some other program as your main viewer. At any rate, if you do do this and decide you don't like it, you can change back simply by unchecking things. Without Irfan set as your viewer, you can still open a picture file by dropping it onto Irfan's shortcut icon. This is very handy if you're sent what you believe to be a picture but with an unfamiliar extension. After you've virus checked such a picture, drop it onto Irfan and you'll most likely get a message telling you that the picture has an incorrect format and asking if Irfan should fix this.
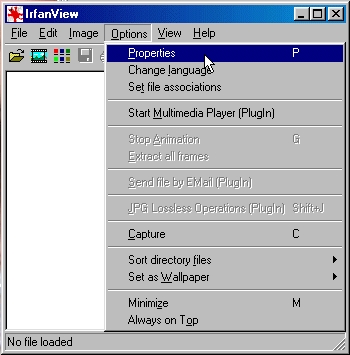
Open IrfanView and click Options on the menu bar, then Properties on the menu that appears. Then Click on the Extensions tab. There're things of interest on every tab you see, but for now we're only interested in which files open automatically in Irfan. top

To see all of the file types that Irfan can open, you have to do some scrolling, because there are lots. The file types aren't in precise alphabetic order, so you need to look at each screenful.
Leave "Load only associated file types" unchecked. That way, when you're looking through the pictures in a folder, you'll see each picture that Irfan is able to display.
I have both of the items at the bottom checked, but Irfan warns not to do this if you use the Microsoft Office toolbar, as some sort of conflict can happen.
For most photographs, the extensions you'll be interested in are jpg and bmp. If you have photos with other extensions you probably know a lot more about this subject than I do, and you're using PhotoShop or The Gimp.
Having checked the file types you want Irfan to open when you double click them, click OK.
Remember, you can always come back to this tab and check or uncheck different items. It's heaps easier than making or changing associations in the Windows "Open with" box! top
Return to Look at the Dimensions.
The Status Bar in Detail
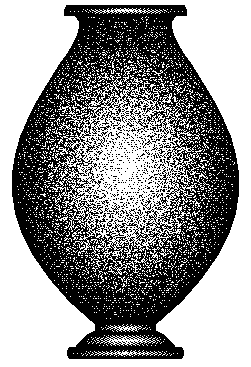
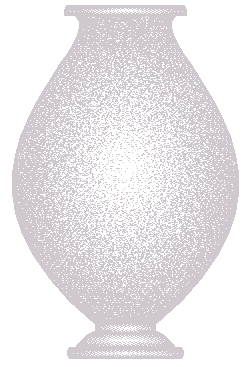
Go back to plain picture. This is the status bar shown above, with each part labelled. The colour of the text can be matched to that of a rectangle on the status bar. The disk size of a picture is determined by its width and height and the number of colours it contains. The number of colours it is capable of containing is identified by "Bits Per Pixel". A picture that uses only one colour and white needs only to use one bit per pixel, which would appear here as 1 BPP. (You can simulate shading in a 1 BPP picture, of course. It's done by putting black dots closer together or further apart like this, or use the same idea, but with a colour other than black, like this.) Such pictures are small—each of these is 8 kilobytes.
Pictures with no more than 16 colours, like this one of the status bar and labels, can be saved as 4 BPP pictures, which are quite small on disk. This picture is 4 kilobytes.
Most gif images make use of a 256 colour palette. They are 8 BPP pictures. This is a good way to save pictures that have clearly defined areas of colour. It is not at all a good way to save most photographs. (I say "most" because a photograph of, say, a red-on-white warning notice will go fuzzy around the edges of the lettering if saved as a jpg and will be much cleaner and clearer as a gif.) top
Photograph Formats
When you come to 24 BPP pictures—very often photographs—the format in which you save them, the number of colours they use, and the arrangement of those colours all make a difference to the disk size.
Paint in the latest versions of Windows saves in png format, which is excellent.
The Windows bmp format makes a record of each pixel in the whole picture. The jpg format records areas of colour and their positions. So if a picture has a big green square in the top left-hand corner, bmp will write "1x1 green, 2x1 green, 3x1 green" and so on for as long as it takes, while jpg will write "1x1 to 98x98 green". Therefore the bmp format writes the same sized file for a very simple picture and a very complex picture of the same pixel size, while the jpg format file size increases with the complexity of the picture.
The down side of the jpg format is that boundaries will be fuzzy. If you're going to print the picture at a high resolution, the space-eating bmp is better.
You can save pictures as jpg files in Windows Paint—sort of. There are two problems: there's no way to set compression and thus save small, and when you open a Paint-saved jpg in another graphics program you'll sometimes be told that it is not a valid jpg at all! So don't bother with Paint's jpg save—or, if you do, drop it onto another graphics program and save again.
Now your friends' enjoyment of your pictures won't be spoiled by long download times. top
The quickest way to make photos smaller
Download PhotoRazor
PhotoRazor is just what you need if your friends complain that photos you email are too big.
You browse to a folder of pictures of which you'd like to have emailable copies. You select the pictures—all or just some. If any picture is sideways or upside-down, you can click a rotation button at the bottom right of the screen to fix that.
You then choose size and quality for the copies. Usually, pictures with lots of detail, like a vine covered with tiny flowers, need a higher quality than those with big areas of fairly plain colour.
When you click the button labelled "Resize Photos Now", PhotoRazor makes a new folder called "small photos" into which it puts the copies it creates. Your original pictures are completely untouched, but those in the "small pictures" folder fit nicely into an email, have had all exif data removed, and are between a twentieth and a fortieth of the disc size of the originals!
Exif data is information about the taking of a photo—make and model of camera, date, all the settings used, etc. etc. This information may be very useful to the photographer, but adds a couple of kilobytes to the size of a file being sent. top
Please read also the article about keeping attachments small.
Questions or comments? I'd love to hear from you. My email address is here.
Return to top
02/10/2005