Make Your Own Gift Wrap in Paint
This project is good fun and can have very nice results. You can use a tile you design yourself to make personalised wrapping paper for a small gift—one small enough to be wrapped in a sheet of A4 paper. You may have some light-weight or coloured paper that would be ideal for this, but even on ordinary white paper it's still personal and pretty.
Programs needed
I used to have a long complicated way of printing the gift wrap, involving changing settings in Internet Explorer. Now it's all much simpler. You'll use three programs: Paint, AMP Tile Viewer and the almost indispensable Irfan View
Getting started
Have a shortcut to Tile Viewer where you can get to it easily.
Open Paint and save a working file. Since this is to be printed and not emailed, if you have heaps of disk space you can save as a 24 bit bmp if you like. If you'd like to save later in the much smaller gif format, save this working file as a 256 Color Bitmap, so your colours will be preserved when you resave. I'd use a name like giftwrap_play.bmp.
Draw a square

 Click on the Rectangle tool and choose the bottom option, solid rectangle with no outline.
Make a silver-grey square about 200 by 200. (This size is arbitrary; Half that will do if you'd rather have a small, dainty pattern.) I chose grey because it's probably not a colour you'd want to use in a bright pattern. The background colour will be replaced with white at the end—it saves ink. The other colours you use will stay the same. top
.
Type some text
 Click on a colour youd like to use for part of your design.
Click on the text tool and on the Transparency option at the bottom of the tool box.
 In a clear space below the grey square, draw a text area big enough for the first part of your greeting.
.
Choose a fancy font in a largish size to write the person's name, your own name, or a greeting.
I used Black Chancery, Size 20, Bold for the words "Happy Birthday".![]()
Until you click away from the text area, you can change font, size and colour as many times as you wish, until you like what you see.
When you are happy with font, size and color, click away from the text area.
Save. (Go to the menu bar and click on File > Save, or just press Ctrl+s.) I might forget to repeat that, but do save every so often.
Choose a different colour and draw another text area beside the finished text. (If it's underneath, you might have trouble selecting the text once it's been skewed.)
![]()
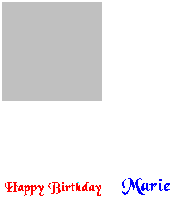 Write the other part of your message. I used Black Chancery, Size 28, Bold for "Marie".
Your workspace now looks something like the picture on the left.
.
Skew the Text
![]() Click the Rectangular Selection tool and draw a marquee around all the text.
Click the Rectangular Selection tool and draw a marquee around all the text.
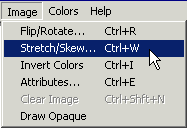 Click Image on the menu bar and choose Stretch and Skew.
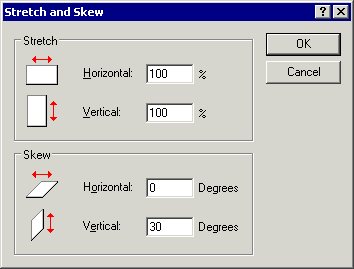 Ignore the top half of the box. In the Skew part, write 30 in the Vertical slot. Leave the other at 0.
Now you should have something like this. 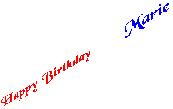
.
Add Text to Square
Click away, then draw a new marquee around just one part of the text. Choose whichever part is longest.
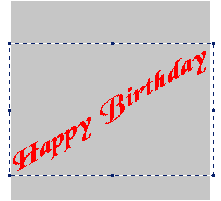 Pick up the selection and drag it onto the grey square.
If it turns out that the text is a bit too wide for the square, drag the text away and drop it back into a clear place before you make the square just a little but bigger. Then try again.
Click away.
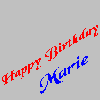 Select the second piece of text and place it under (or over) the first.
Remember to save.
Make Decorations
Now make some decorations. Either draw your own, or use something from a picture or symbol font.
![]() If you choose to do the latter, click the Text tool and draw a text area.
If you choose to do the latter, click the Text tool and draw a text area.
Choose a font such as Wingdings—any font that has little pictures.
Or you could simply type an asterisk (*) in the largest size. You don't have to accept just the sizes offered in the text tool bar; if you type in a larger size—say 100—as soon as you click into the text area your text will assume that size.
Each font has its own asterisk; some are rounded, some have different numbers of arms. After you've typed an asterisk, click on different fonts until you find one that you like.
To use two different ones, type one, click away, and draw a new text area for the second one. Paint only lets you use one font, size and colour each time. top
Fancy them up
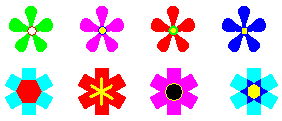 Type the same symbol several times, then click away, change tools, zoom in and recolour and add some details.
These are some decorations I made using an asterisk.
Put the decorations onto the square
Select decorations one at a time, hold the Ctrl key as you begin to drag, and arrange them on the grey square.
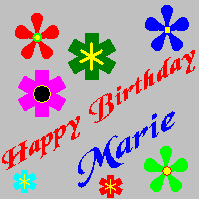 You may like to select one or two and resize them to 50%, to put into places that look empty.
Distribute the decorations all over the square, but leave one or two pixels clear around the edges.
Copy and Save
Draw a marquee around the grey square. In this particular case, it doesn't matter if your selection is slightly outside the square. Only very slightly, though, or else you'll get a lot of empty space.
Go to the Edit menu and click Copy To.
Type a name: giftwrap01, birthday_background, birthday_tile—something of the sort.
Click Save. top
Remove the grey background
Back in Paint, go to the File menu and click Open.
Navigate to the cutout picture you just saved.
Click Open.
If you haven't saved your workspace, Paint will ask you to do so. Click Yes.
![]() Click on the Flood Fill tool.
Click on the Flood Fill tool.
Make sure that you have white as your background colour.
 With your right mouse button, click anywhere on the grey.
The grey becomes white, but the enclosed parts of the letters are still grey.
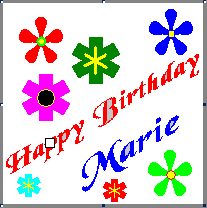 Click on the Eraser tool.
In the colour palette, click with your left mouse button on the silver-grey.
Pressing with your right mouse button, drag the eraser all over the bits of the text that are still gey.
When all the grey has gone, go to the File menu and click Save.
Go to the Edit menu and click Select All.
Then open the Edit menu again and click Copy. top
Make the tile into a mosaic
Open AMP Tile Viewer. (You can now close Paint or leave it open; it doesn't matter.)
The Tile Viewer will show a black, empty window.
If it's a small window, click the Maximise button in the top right corner, at the end of the title bar. It's the middle one of these.![]()
Go to Edit menu and click Paste.
You'll see your tile repeated all over the screen.
Click the Save icon on the toolbar, or Open the File menu and choose Save mosaic as.
If you don't want to save into the suggested location, navigate to the folder in which you do want it saved.
Type a name for your gift wrap. It should not be quite the same name as you used for the tile, but you could simply add a number to that name, as giftwrap02 or birthday_background2, for instance.
The Save as type place will read JPEG image. You don't want to save into that format, because your picture would be degraded. Click the drop-down arrow and choose Windows Bitmap image. This will be a ferociously large file, but you can discard it after printing, or open it in Paint or Irfanview and resave it as a gif.
Click the Save button.
Close the tile viewer. top
Print the gift wrap
Open the saved background in Irfanview. (If Irfanview is your default image viewer, just double click the name of the file. Otherwise, open Irfanview, click the File menu and choose Open and navigate to the saved file.)
Go to the File menu and choose Print.
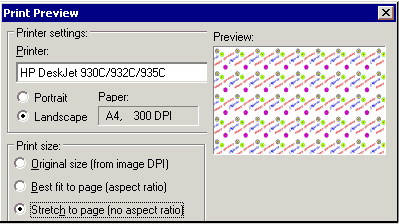 This shows only parts of the dialogue box that will come up.
Set your paper to Landscape.
Look at the Preview in the top right corner of the dialogue.
If you choose Best fit to page, your pattern will be printed exactly as you made it, but there will be a strip of unprinted paper along one long side.
If you choose Stretch to page, your picture will be slightly distorted. I don't find the distortion very noticeable, but the choice is yours. Test printing isn't really an option unless you have a source of free ink. ![]()
When it's all set, click the Print button in the lower right corner.
Close Irfanview and wrap the present.
Questions or comments? I'd love to hear from you. My email address is here.
Return to top
Drop-Down Menu from Brothercake
Everything below this is a javascript menu. If you are using a reader,
please use the links here.